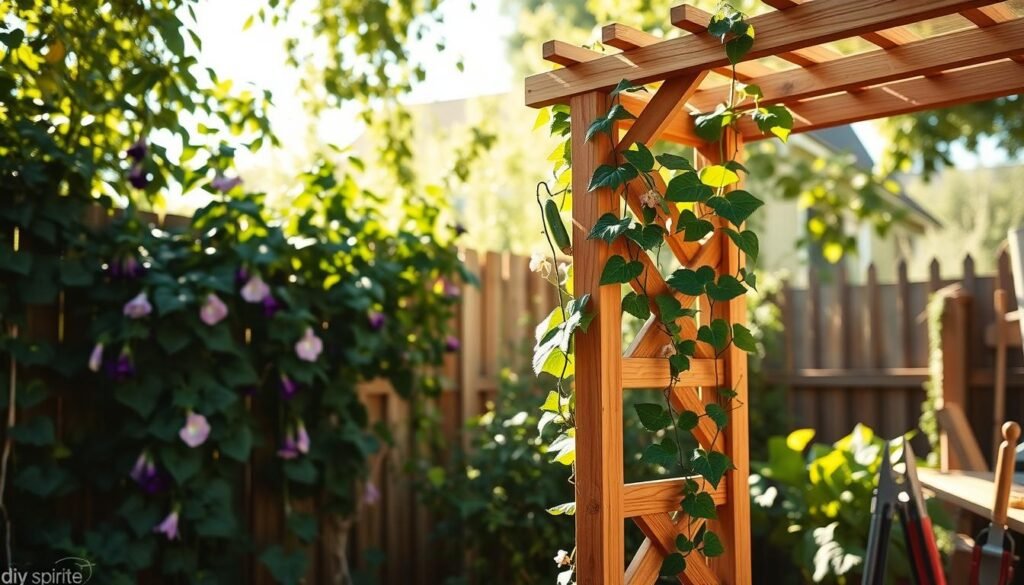
Make your living room look better with handmade coasters. They keep your furniture safe from water marks and spills. Plus, they add a special touch to your coffee table.
Making your own coasters is a fun and rewarding task. You can pick from many materials and designs. This way, you can create unique pieces that show off your style and match your home.
There are many designs to try, from simple to complex. These coasters can make your home look better and start interesting conversations with your guests.
The Charm of Handcrafted Wood Coasters
In a world filled with mass-produced items, handmade wood coasters shine with their unique charm. They offer a character that factory-made products can’t match.
These custom wood coasters add a personal touch to any room. They make your home decor stand out. Each coaster is a one-of-a-kind piece, showing the skill and care of its creator.

Handmade coasters bring a rustic or natural vibe to your space. They can fit any decor style, from modern to traditional. This makes them perfect for adding a special touch to your home.
What’s more, you can customize these coasters to match your style or decor. This makes them not just useful but also a way to express yourself.
Choosing handmade coasters means you’re supporting artists and the art of woodworking. This personal connection adds value and appreciation to the coasters.
Essential Materials and Tools for DIY Wood Coasters
Making beautiful DIY wood coasters starts with knowing what you need. You’ll need the right supplies to make stylish and useful coasters.
Choosing the wood for your coasters depends on the look and how long they’ll last.
Hardwoods vs. Softwoods for Durability
Hardwoods like oak and maple are strong and last longer. They’re perfect for coasters that get a lot of use. Softwoods, like pine, are cheaper but not as durable. A mix of engineered wood or hardwood and softwood is a good choice for both cost and durability.

Pre-cut wood tiles or coaster blanks are great for beginners. They save time and let you focus on design and finishing.
You’ll also need a saw, sandpaper, and a sealant or finish. Depending on your design, you might need a drill, paint, or other decorations. With the right materials and tools, you can make beautiful coasters that protect your furniture and add style to your home.
Now that you have your materials and tools, you’re ready to start making your coasters. Whether for yourself or as gifts, this DIY project is fun and rewarding.
Preparing Your Wood for Coaster Projects
Page
Before starting your wooden coaster project, it’s key to prepare your wood well. This ensures a professional finish. The quality of your coasters greatly depends on the wood preparation.
Start by sanding the wood to a smooth surface. This is vital for showing off your wood coaster art. Sanding removes flaws and opens the wood grain, helping finishes to stick better.

To get a silky finish, use different grits of sandpaper. Begin with a coarse grit (80-100) to remove big flaws. Then, move to finer grits (220-240) for polishing. Some artists even use 320 grit or higher for an extra-smooth look.
Hand vs. Power Sanding Methods
When sanding, craftsmen often choose between hand and power sanding. Hand sanding is great for detailed work or small areas, giving you control. Power sanding, on the other hand, is faster and better for big surfaces, saving time.
Using both hand and power sanding gives the best results. It helps in smoothing the wood first and then adding the final touches.
By carefully preparing your wood and picking the right sanding methods, you can make your coasters look amazing. They’ll not only be useful but also beautiful pieces of wood coaster art.
1. Rustic Burned Wood Coasters with Custom Monograms
Rustic burned wood coasters with custom monograms are both functional and beautiful. They add a handmade touch to any room. Wood burning allows for detailed designs and personal touches. Adding custom monograms makes each coaster unique.

Temperature Control Tips
For wood burning, aim for a temperature of 700°F to 800°F. Adjust this based on the wood type and desired burn look. This ensures the best results.
Practice Patterns to Try First
Start by practicing on scrap wood before your final project. Try simple designs like lines and circles. This helps you get used to the tool and wood.
Custom monograms make your coasters special, perfect for gifts or personal use. The rustic look fits many decor styles. With patience and practice, you can make beautiful, useful items that show off your skills.
Wood burning is an art that lets you create unique coasters. They add warmth and character to any space. Whether you’re experienced or new, making these coasters is a fun DIY project.
2. Epoxy Resin River Coasters with Natural Wood Edges
Mixing epoxy resin with natural wood edges makes coasters that are both beautiful and useful. This mix combines the natural look of wood with the modern shine of epoxy resin. It creates a standout piece for your home.

To make these coasters, start by picking the right wood and epoxy resin. The wood edges add warmth and character. The epoxy resin makes the coasters strong and water-resistant.
Mixing Ratios and Curing Times
Getting the right epoxy resin finish is all about the mix and cure times. You’ll need to follow the product’s mixing ratio, usually 1:1 or 2:1 with hardener. The cure time depends on the temperature and the epoxy type, but it’s usually 24 hours.
Bubble Prevention Techniques
Stopping bubbles in epoxy resin is a big challenge. Try heating the resin with a torch to remove bubbles or use a bubble agent. Slow mixing also helps avoid air bubbles.
With practice in mixing and curing, and using bubble prevention methods, you can make stunning epoxy resin coasters. They’re not just useful but also a beautiful art piece for your home.
3. Geometric Pattern Painted Wood Coasters
Geometric pattern painted wood coasters bring modern elegance to your home. They are stylish and simple to make. These coasters protect your furniture and add beauty to your space.
 To make painted wood coasters, start by picking the right materials. You need wooden coaster blanks from craft stores or online. Make sure they are sanded smooth for painting.
Plan your geometric design next. You can pick from chevrons, herringbone, or mandalas. Lightly sketch your design on the wood with a pencil. Use stencils or tape for sharp lines and edges.
Start painting with acrylic paints after sketching. You can use one color for a simple look or many colors for a bold effect. Wait for the first coat to dry before adding more coats or details.
After the paint dries, apply a clear varnish coat. This protects your design and gives a glossy finish. It’s key for durability and moisture resistance.
Geometric pattern painted wood coasters are perfect for gifts or your home decor. Try different patterns and colors to match your style.
4. Photo Transfer Personalized Memory Coasters
You can make coasters from your favorite memories using photo transfer. This method lets you decorate your home with photos, making it special and meaningful.
To make these coasters, you can use the Mod Podge method or the gel medium technique. Both are easy to do and look great.

The Mod Podge method uses a decoupage medium to transfer photos. First, print your photo on regular paper with a laser printer. Then, apply a thin layer of Mod Podge to the coaster and place the photo face down. Let it dry, then wet the paper and rub it off to reveal the image.
Gel Medium Technique
The gel medium technique is another good way to transfer photos. Apply gel medium to the coaster, place the photo face down, and let it dry. After drying, wet the paper and rub it off, just like with Mod Podge. This method can give a softer, more artistic look.
Both methods let you make coasters that are both useful and full of memories. They’re perfect for gifts or to decorate your own home. Photo transfer coasters are a creative way to keep your memories close.
5. DIY & Personalized Wood Coasters: Stylish Handmade Ideas with Laser Engraving
Laser engraving has changed how we make personalized wood coasters. It brings unmatched precision and detail. This tech makes it easy to create designs that were hard to do by hand before.
Laser engraving opens up new creative paths for wood coasters. You can make custom monograms or complex patterns. The detail is amazing, perfect for unique gifts or home decor.

Text-based designs are a big hit with laser engraving on wood coasters. You can add names, special dates, or quotes. The laser engraving makes sure the text is clear, even at small sizes.
Intricate Pattern Options
For those who love complex designs, laser engraving is great. You can make everything from geometric shapes to floral motifs. This makes laser engraved coasters a top choice for home decor.
In short, laser engraving is a versatile and precise way to make personalized wood coasters. It’s perfect for both text-based designs and detailed patterns. This tech makes it easy to get professional-looking results.
6. Cork-Backed Wooden Tile Coasters
Wooden tile coasters with cork backing are both useful and stylish. The cork backing keeps your furniture safe from water marks and spills. It also makes the coasters less likely to slide around.
To make these coasters, you need wooden tiles, cork sheets, strong adhesive, and sealant. Start by cutting the cork sheets to fit your wooden tiles. Then, apply a thin layer of adhesive to the back of the tiles and stick on the cork sheets.

After the adhesive dries, seal the coasters to keep them dry. Use a clear varnish or resin for this. This step is key to making your coasters last longer.
Cork-backed coasters are not just useful; they’re also easy to customize. You can stain or paint the wooden tiles to match your home’s style. You can even use a Cricut machine to add cool designs to the cork or wood.
Wood and cork together make a coaster that’s both green and chic. These coasters are perfect as gifts or to add a personal touch to your home. They protect surfaces and show off your crafting skills.
7. Reclaimed Wood Coasters with Metal Accents
Reclaimed wood coasters with metal accents mix rustic charm with modern style. This combo makes a piece that stands out in any home. The wood is eco-friendly, and the metal adds a sleek look.

Making these coasters involves inlay and corner accenting. These techniques add elegance and sophistication.
Inlay Techniques
Inlay techniques embed metal designs into the wood. This can be done with laser cutting or metal inlay. The result is a stunning design that catches the eye.
Corner Accent Options
Corner accents add metal touches to the coasters. You can use metal corner protectors, decorative rivets, or small ornaments. These accents enhance the look and protect the coasters from damage.
By mixing reclaimed wood with metal, craftsmen make unique and useful items. These coasters can fit any style, from rustic to modern. They bring sophistication to any room.
8. Hand-Painted Nature-Inspired Wooden Coasters
Hand-painted nature-inspired wooden coasters bring the outdoors into your home. They add natural beauty and are both functional and decorative. They can start interesting conversations.
To make these coasters, think about leaves, flowers, or trees for inspiration. Use watercolor or acrylic paints for different looks. Let your creativity shine and try new techniques.

You can copy nature’s patterns, like wood grain or flower petals. Or, paint scenes like a forest or a flower garden. These coasters can match your home’s style or be a special gift.
Apply a clear varnish or sealant to protect the paint. This keeps the artwork safe and makes the coasters water-resistant. They’ll stay beautiful and useful for many years.
Creating hand-painted nature-inspired wooden coasters is a great DIY project. It’s perfect for both experienced crafters and beginners. It lets you express your creativity and make something unique and meaningful.
9. Stained Glass Effect Wooden Coasters
Creating stained glass effect wooden coasters is a unique way to add elegance to your home. This method uses materials and processes to look like stained glass on wood.
To start, you’ll need a few basic supplies. These include wooden coasters, a glass etching compound, and colored resin or paint. First, prepare your wooden coasters, making sure they are smooth and dry.
Then, apply the glass etching compound to the areas for the stained glass effect. This compound makes the wood look frosted, like glass.

After applying the etching compound, add color with colored resin or paint. This is where you can be creative. Choose colors that match your home or personal taste.
The stained glass effect comes from layering the colored resin or paint over the etched areas. This creates a beautiful, translucent look, like stained glass.
This technique is great for customization. You can try different colors and designs. This way, you can make coasters that are truly unique and fit your style.
By following these steps and using the right materials, you can make stunning stained glass effect wooden coasters. They will add elegance to any room.
10. Personalized Family Recipe Coasters
Making personalized family recipe coasters is a thoughtful way to keep your family’s cooking traditions alive. These coasters not only protect your tables from water marks and spills. They also remind you of the special recipes passed down through generations.
To make these unique coasters, start by picking your favorite family recipes. Decide how to show them off. You can mix digital methods with old-school techniques to keep the original handwriting.
Digital Conversion Methods
One way to make personalized family recipe coasters is by turning your recipes into digital files. Scan or take photos of the original recipe cards. Then, use image editing software to improve the image, change its size, and add text or graphics.

To keep the original handwriting, try decoupage. Glue the original recipe card onto the coaster, or print the digital image on paper. Then, decoupage it onto the coaster. This way, the original handwriting stays intact and adds a personal touch.
By using these methods, you can make beautiful and meaningful personalized family recipe coasters. They will be treasured for years. Whether you use them in your kitchen or give them as gifts, they’re sure to impress.
Troubleshooting Common DIY Wood Coaster Problems
Making DIY wood coasters is fun and rewarding, but it comes with challenges. Whether you’re experienced or new, problems can pop up. We’ll look at common issues and how to fix them to get great results.
Uneven wood surfaces are a common problem. Make sure to sand your wood well before finishing. If it’s not even, try using a wood conditioner to fix the grain.

Issues with epoxy resin not drying right are common too. Double-check your resin and hardener mix. Also, make sure your workspace is at the right temperature.
Warped coasters can be a problem. Dry your wood well and keep it in a dry place. If a coaster warps, use a clamp to straighten it while it dries.
Knowing these common problems and how to avoid them will help your DIY project succeed. Happy crafting!
Creative Packaging and Gift Ideas for Handmade Coasters
Make your handmade coasters into beautiful gifts with these creative packaging ideas. Handmade coasters are not just useful items. They are also thoughtful presents for many occasions.

When you give handmade coasters as gifts, the packaging is just as important. Think about using decorative boxes, cloth bags, or wooden crates. These choices match the rustic or handmade look of your coasters.
Wedding and Housewarming Gifts
For weddings, add a personal touch by including the couple’s names or a special message. Housewarming gifts can have a note saying “Warmest Wishes” or something similar. These touches make your coasters even more special.
Holiday and Birthday Presentations
For holidays or birthdays, add a festive flair to your packaging. Use colored ribbons, holiday-themed wrapping paper, or birthday balloons. This shows you put thought into the gift and the occasion.
By creatively packaging your handmade coasters, you highlight their beauty and your care. Whether it’s for a wedding, housewarming, holiday, or birthday, your coasters will be treasured gifts.
Caring for Your Handcrafted Wooden Coasters
To keep your handcrafted wooden coasters in great condition, it’s essential to follow a few simple care tips.
Wooden coasters are a beautiful and functional addition to any home. They do require some maintenance to keep them looking their best. Regular dusting with a soft, dry cloth can help prevent scratches and keep your coasters looking like new.
For more thorough cleaning, a damp cloth can be used. But be sure to dry the coasters immediately to prevent water damage. Avoid using harsh chemicals or abrasive cleaners, as these can damage the finish or harm the wood.
In addition to regular cleaning, there are a few maintenance tips to keep in mind. Avoid exposing your wooden coasters to direct sunlight or extreme temperatures. This can cause the wood to fade or crack.
By following these simple care tips and maintenance tips, you can enjoy your handmade coasters for years to come. Proper care will help preserve the quality and longevity of your wooden coasters. This keeps them a beautiful part of your home decor.
Conclusion
Making your own diy & personalized wood coasters is a fun project. It adds warmth and style to any room. This article has shown you many ways to make beautiful coasters.
You can make coasters that protect your furniture and look great. Try making rustic burned wood coasters or epoxy resin river coasters. Adding personal touches like custom monograms or family recipes makes them special.
DIY wood coasters are perfect for improving your home decor or as a thoughtful gift. With the right care, they’ll last for years. They show off your creativity and skill.
Creating your own coasters adds a personal touch to your space. They’re also useful and appreciated every day.