Turning frustration into pride is what skilled woodworkers do best. They use their years of experience and deep knowledge of woodworking to make amazing things.
Whether you’re just starting or have been woodworking for a while, getting the right tips is key. A good guide can teach you the tools, strategies, and techniques pros use to get great results.
By using professional tips and techniques, you can improve your skills. You’ll make beautiful, useful pieces that show off your talent.
Mastering the Fundamentals: Essential Woodworking Skills
Building a strong foundation in woodworking is key for any beginner. Learning the basics boosts your work’s quality and makes you safer and more efficient in the workshop.
One of the basic tools in woodworking is the combination square.
Using Combination Squares Effectively
A combination square is very useful. It helps you measure, mark, and check your work’s accuracy. To use it well, hold it right and make sure the blade is in good shape. Always check its accuracy against a known standard to keep your work precise.

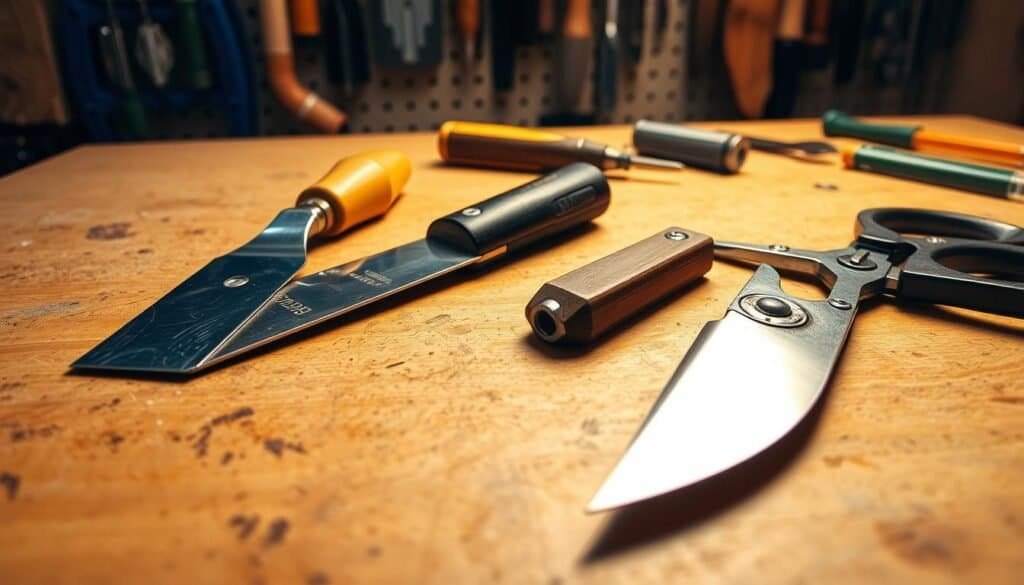
Marking Knife Precision Methods
Using a marking knife for precise layout work is another key skill. A marking knife is better than a pencil for fine joints. To get precise marks, hold the knife at a steady angle and move it firmly. This method is great for making joints that need to be very accurate.
By mastering these basic skills, woodworkers can greatly improve their projects. Whether it’s a simple DIY tool or a complex piece of furniture, the precision and accuracy will show in your work. Adding homemade DIY tools to your workflow can also make woodworking more fun and cost-effective.
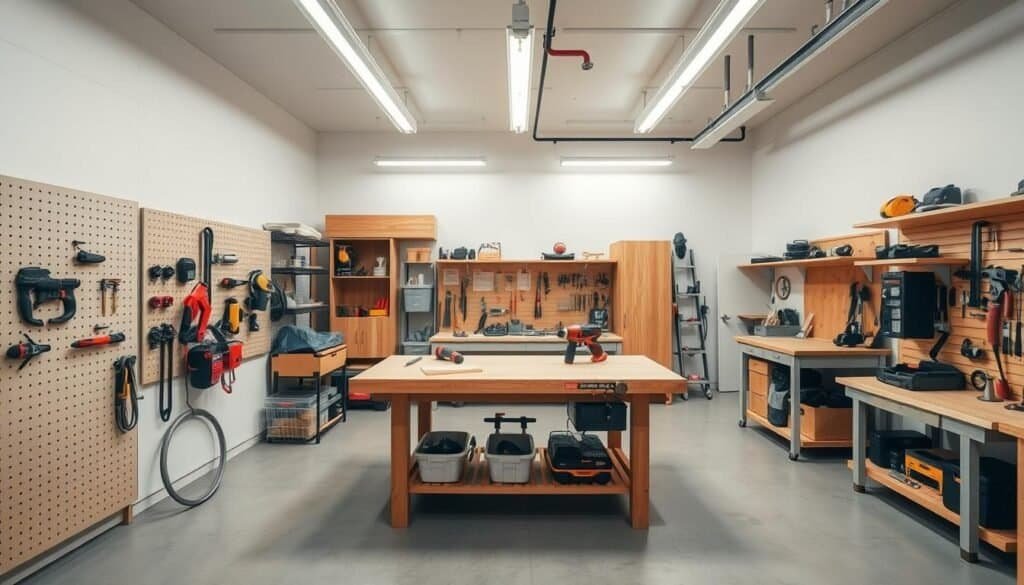
Setting Up Your Workshop: Space Organization Tips
To get the most out of your workshop, setting it up right is key. A tidy workshop makes your work easier and more enjoyable. It’s all about arranging your space so you can move freely and find what you need quickly.

Task lighting is another important part of a good workshop. It helps you work better by easing eye strain and making things clearer to see.
Task Lighting Placement Strategies
Place lights where you do detailed work, like at your bench or near the table saw.
Use LED strip lights or under-cabinet lights to brighten your work areas. Adjustable arm lights are great for focusing light where you need it. This reduces shadows and glare, making your work easier.
With these tips, you can make your workshop a place where you love to work. A well-organized workshop is the first step to better woodworking skills and successful projects.
Tool Selection: What the Pros Actually Use
Woodworking pros know that good tools make their work better. The right tools can take a project from okay to amazing. They look for tools that are durable, precise, and perform well.
Chisels are a key tool for woodworkers.
Quality Chisels and Their Maintenance
Good chisels last long and stay sharp. Pros like Stanley or Wüsthof chisels for their quality.

Keeping chisels in good shape is important. Regular sharpening and proper storage help them last longer. Woodworkers use honing guides for sharp angles.
When to Splurge vs. When to Save
Choosing tools can be tough. Should you spend more on quality or save with cheaper options? For chisels, it’s worth it for their lasting quality and performance. But for simpler tasks, cheaper tools work fine.
Finding a balance between cost and quality is key. Invest in top tools for precise and durable tasks. Save on tools for simpler projects. This way, woodworkers get the best without overspending.
The best tools meet the user’s needs. They offer quality, function, and value. By picking and caring for their tools, woodworkers can make their projects look professional.
Tool Maintenance: Extending the Life of Your Equipment
Keeping your tools in good shape is key for both longevity and safety. Regular care ensures your tools work well, giving you precise cuts and finishes. This is vital for woodworkers who need their tools for detailed work.
Creating and Maintaining the Perfect Edge
Having a sharp edge on your tools is essential for smooth cuts and less tear-out. To keep your tools sharp, use a sharpening stone or diamond file. Also, store your tools in a dry place, away from extreme temperatures, to make them last longer.

Tool care is more than just sharpening. It also means cleaning, lubricating, and checking your tools often. For example, cleaning your tools after each use stops debris buildup that can damage them. Lubricating parts reduces wear and keeps your tools running smoothly.
By adding these tool care tips to your daily routine, you’ll make your tools last longer. This will also enhance your woodworking experience. Proper tool maintenance is a simple way to ensure your projects are done right, with precision and quality.
The Woodworker’s Playbook: Smart Tips Pros Swear By
Woodworking pros say batch processing is key. It saves time and boosts efficiency. By doing similar tasks together, you can make your work flow better, set up less, and work more productively.

Batch processing means doing the same tasks in one go. For example, cutting all wood pieces to the same length at once is smarter than cutting them one by one. This way, you save time and effort.
Batch Processing Similar Operations
Batch processing works for many woodworking tasks like sanding, drilling, or putting parts together. It cuts down on switching tasks and mistakes.
Let’s say you’re making custom cabinets. Sand all the doors together before you start assembling. This method saves time and keeps the sanding quality consistent.
To use batch processing well, first identify tasks you can group. List your project’s tasks and find similar ones to batch. With time, batch processing will be a key part of your workflow. It helps you finish projects faster and with more accuracy.
Material Selection: Choosing the Right Wood for Your Project
The wood you pick greatly affects your woodworking project’s outcome. It’s key to choose wisely. With many types of wood out there, knowing what your project needs is vital.
Think about your project’s purpose, the look you want, and how long it should last. Hardwoods like oak and maple are strong and durable. Softwoods like pine are better for projects where cost matters.

Lumberyards are great for finding wood, including rare and reclaimed types. Visiting local ones can help you find unique materials for your projects.
When looking at wood, check for any flaws. Look at the grain, color, and texture to see if they fit your project. Ask the staff about the wood’s background, its features, and how it can be used.
By understanding the wood’s qualities and uses, you can find special pieces. These can take your woodworking from good to amazing. Whether it’s furniture, decorations, or useful items, the right wood makes a big difference.
Precision Cutting Techniques
To make sure your woodworking projects are accurate, you need to master precision cutting. This skill is key to creating clean joints and a professional look.
Setting up your tools right is important. This means making sure your saw’s fence is aligned properly.
Setting Up Foolproof Fence Alignments
Your saw’s fence must be parallel to the blade for accurate cuts. If it’s not, your cuts will be off, and your project could fail.
To align your fence, check its position at both the front and rear. Adjust it so it’s parallel to the blade.

Template routing is another way to improve precision cutting. It lets you cut multiple pieces to the same size.
This is great for projects with many identical parts. A router with a template guide bush helps you make exact copies of the template on your workpiece.
By getting good at precision cutting, like aligning fences and using templates, your woodworking will get better. These skills make your projects more accurate and help you work faster.
Joinery Secrets: Creating Strong, Beautiful Connections
The art of joinery turns separate wooden parts into a single, strong, and beautiful piece. It’s key in woodworking, making items both lasting and good-looking.
Joinery methods are mainly hand-cut and machine-cut. Each has its own benefits and drawbacks.
Hand-Cut vs. Machine-Cut Approaches
Hand-cut joinery uses traditional tools for making joints. It offers precision and beauty but takes a lot of skill and time.
Machine-cut joinery, by contrast, uses power tools for faster and consistent results. It’s better for big projects or mass production.

Choosing between hand-cut and machine-cut joinery depends on the project, tools, and the craftsman’s taste. Knowing each method’s strengths and weaknesses is key for making strong, beautiful connections.
Success in joinery comes from precision, detail, and quality craftsmanship. Mastering joinery techniques boosts the quality of woodworking projects.
Sanding and Surface Preparation
The secret to a stunning woodwork lies in the sanding and surface preparation process. Sanding is a critical step that can make or break the quality of your woodwork plans. It’s not just about smoothing out the wood; it’s an art that requires precision and patience.
To achieve a smooth surface, start by selecting the right grit sandpaper for your project. Begin with a coarse grit to remove any imperfections and gradually move to finer grits for a polished finish. This process helps in taming tear-out, a common issue where the wood fibers are pulled out, leaving an uneven surface.
Taming Tear-Out and Blotching
Tear-out and blotching are two common problems faced during sanding. Tear-out occurs when the sandpaper pulls out the wood fibers, while blotching refers to the uneven absorption of stain, leading to discoloration. To minimize tear-out, use a sharp sanding tool and work in the direction of the wood grain. For blotching, apply a wood conditioner before staining to ensure even absorption.

Surface preparation is equally important as it ensures that the wood is ready for finishing. This involves cleaning the surface to remove any dust or debris and applying a suitable finish. By mastering sanding and surface preparation, you can significantly enhance the quality of your woodwork projects.
In conclusion, sanding and surface preparation are key steps in achieving a professional-looking finish. By understanding how to tame tear-out and blotching, you can improve your woodworking skills and create stunning pieces.
Finishing Techniques: From Good to Extraordinary
A well-done finish is key to showing off the wood’s beauty and the craftsman’s skill. Finishing is more than just varnish or stain. It’s about bringing out the wood’s natural look and keeping it safe from damage.
Woodworkers have many finishing techniques to try. Each has its own benefits and challenges. Knowing these methods helps get the look you want.
Brush, Wipe, or Spray: Choosing the Right Method
Woodworkers can choose from brushing, wiping, or spraying to apply finishes.  Brushing is traditional and gives control, perfect for small, detailed projects. Wiping is quicker and works well for big, flat areas. Spraying gives a smooth finish but needs special gear and good air.
The right method depends on the project, the finish you want, and what tools you have. Brushing is great for detailed work, while spraying is best for a flawless look on big pieces.
Preparation is essential, no matter the method. Make sure the surface is smooth and dust-free. Pick the right finish and follow the instructions for applying and drying.
By learning different finishing techniques and picking the best one for each project, woodworkers can make their work stand out. They show off their skill and care in every detail.
DIY Jigs and Fixtures That Save Time and Improve Accuracy
DIY jigs and fixtures are a big help for woodworkers. They make your work more accurate and efficient. By making your own tools, you can make your projects better.
Creating cross-cut sleds is a great DIY project. These sleds help your table saw make precise cuts safely.
Cross-Cut Sleds That Improve Safety and Accuracy
A cross-cut sled is a platform that moves along your table saw’s fence. It holds your workpiece in place. This is key for making straight cuts, even with big or hard-to-handle wood pieces.

To make a cross-cut sled, you need a base of plywood or MDF. You also need runners for your table saw’s slots and a fence for your workpiece. With careful design and build, your sled will help you make cuts that are both accurate and safe.
DIY jigs and fixtures, like cross-cut sleds, do more than just improve accuracy. They also make your work safer. They keep your hands away from the saw blade and lower the chance of kickback.
Project Planning and Execution Strategies
A well-planned project is key to getting top-notch woodworking results. Good planning means defining the project’s scope, picking the right materials, and making a detailed timeline.
Execution strategies are just as vital. They help finish the project on time and within budget. Breaking down the project into smaller tasks helps you focus on one thing at a time. Using carpentry hacks can also make your work flow better.

Dry assembly is a smart technique. It involves putting the project together without glue to check its fit and spot any problems. This method can save time and reduce waste by letting you make changes before the final assembly.
Using dry assembly in your planning and execution can make your workflow smoother. It also helps you get more accurate results. Plus, custom jigs and fixtures can improve your project’s quality and efficiency.
Problem-Solving: Overcoming Common Woodworking Challenges
Woodworking challenges like awkward glue-ups and misaligned joints test your skills. Solving these problems is key in woodworking. Unexpected issues can pop up in any project.
Dealing with tricky glue-ups is a common problem. You need to plan carefully and use the right clamping strategies. This ensures a strong bond.
Clamping Strategies for Awkward Glue-Ups
Standard clamps might not work for irregular shapes or complex assemblies. Using cauls or making custom clamps can help. They ensure even pressure for a tight bond.

For DIY projects, adapting your clamping strategy is important. Creative clamping solutions can help you overcome many challenges. This way, you can achieve professional-quality results.
Improving your problem-solving skills makes you a more confident woodworker. You’ll be ready for a variety of projects.
Safety Practices Professional Woodworkers Never Skip
Professional woodworkers know safety is key, not just a precaution. Keeping the workshop safe is essential to avoid injuries and stay productive.
Using the right equipment and accessories is a big part of safety. This includes wearing safety glasses and hearing protection. It also means having safety features on machines.

Push sticks and featherboards are must-haves for safe woodworking. Push sticks guide wood through machines, keeping hands safe from blades. Featherboards hold wood in place, preventing kickback and ensuring accurate cuts.
Keeping a garage workbench tidy is also important for safety. A messy workspace can cause accidents and slow you down. Organizing tools and materials helps woodworkers stay safe and focused on their work.
By making safety a part of their daily routine, woodworkers can greatly lower injury risks. This makes their workshop a safer, more productive place.
Conclusion: Building Your Woodworking Expertise
Building woodworking expertise takes dedication, practice, and the right guidance. In “The Woodworker’s Playbook,” we covered key skills, tool choices, and techniques. These will help you get better at woodworking.
By mastering the basics and keeping up with learning, you’ll keep improving. Your building skills and woodworking knowledge will grow.
Remember, carpentry knowledge grows with time and patience. Keep your goals in mind and try new things. With hard work and the right attitude, you’ll become skilled in woodworking.
Don’t stop pushing yourself, and your skills will grow. The secret to success is regular practice and a desire to learn from your mistakes.