Want to make your holiday decor look fancy without spending a lot? Making wooden holiday decorations is a budget-friendly and fun way to do it.
With basic materials and a bit of creativity, you can make stunning holiday craft ideas. These can range from ornaments to centerpieces. They can also be personalized to match your style.
In this article, we’ll dive into some amazing projects. They highlight how wood can elevate your holiday decor.
The Charm of Handcrafted Wooden Holiday Decor
Handcrafted wooden holiday decorations add warmth and character to your celebrations.
They are different from mass-produced items because they have a personal touch. Each piece shows the craftsman’s skill and care, making your decor unique.

Wooden Christmas crafts are loved for their rustic charm. They can match any theme, from classic to modern. This makes them great for many decorating styles.
Working on holiday woodworking projects is fun. It lets you make beautiful decorations and spend time with loved ones. You create memories that will last forever.
Adding handcrafted wooden elements to your decor makes your space warm and inviting. It shows off your personal style.
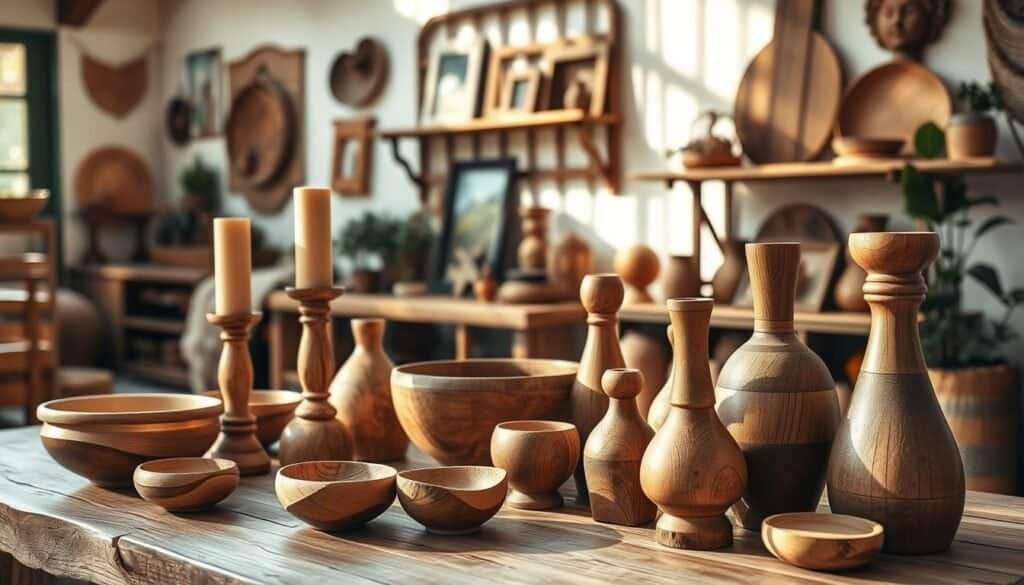
Essential Tools and Materials for DIY Holiday Wood Crafts
To start making DIY holiday wood crafts, you need some basic tools and materials. Having the right stuff makes crafting easier and more fun.
You’ll need a saw, sandpaper, drill, and clamps for most projects. A saw cuts wood into shapes and sizes. Sandpaper smooths out wood, removing splinters and rough spots. A drill makes holes for hanging or assembling. Clamps hold pieces together while the glue dries.

You’ll also need different types of wood like pine, cedar, or reclaimed wood. You’ll also need wood glue, nails, and decorations like paint, varnish, or ornaments. Beginners should start with simple projects and get better as they go.
With these tools and materials, you’re ready for many DIY holiday wood crafts. Whether you’re experienced or new, the right supplies help make beautiful holiday decorations.
Rustic Wooden Christmas Tree Ornaments
Add rustic charm to your Christmas tree with handmade wooden ornaments. Making your own DIY Christmas ornaments is fun and rewarding. It adds a personal touch to your holiday decorations.
Cutting and Shaping
The first step is cutting and shaping the wood. You can use pine or cedar for unique textures. Use a jigsaw or bandsaw to cut out shapes, then sand the edges.

After cutting, decorate your wooden shapes. You can paint, stain, or decoupage them. Use natural materials like twine, pinecones, or dried flowers for a rustic look.
Finishing Touches
To finish, add a protective finish. Use clear varnish or wax to seal the wood and highlight the grain. Then, attach a string or ribbon to hang them on the tree.
By following these steps, you can make beautiful rustic wooden Christmas ornaments. They add warmth and character to your holiday decor. These DIY ornaments are great for the whole family to enjoy.
Elegant Wood Slice Wreath
With just a few simple materials, you can make a stunning wood slice wreath. It’s great for adding rustic charm to your holiday decor.
Preparing Wood Slices
First, prepare your wood slices. Cut them to the same thickness so they lie flat. Pine or cedar are good choices for their smell and look.

After preparing the slices, start building the wreath. Use a hot glue gun to attach them to a wire or foam frame. Leave some space between slices for a balanced look.
Wreath Assembly
Keep adding slices, overlapping them slightly for a full look. You can also add pinecones or dried flowers for extra texture.
Adding Embellishments
For a final touch, add embellishments. Ribbons, bows, or fairy lights can make your wreath stand out.
By following these steps, you’ll have a beautiful wood slice wreath. It’s perfect for your home’s holiday decor. Hang it on your door, use it as a centerpiece, or display it on a wall for a cozy feel.
Wooden Advent Calendar with Hidden Compartments
A wooden advent calendar with hidden compartments is a fun way to count down to Christmas. It adds surprise to the holiday season, making it memorable for your family.

To start, build the advent calendar’s structure. Use wooden planks or panels for your design. Make sure it’s sturdy for the compartments and items inside.
Creating Compartments
The magic happens when you create the hidden compartments. Design small drawers or boxes that fit into the structure. Ensure they’re secure and easy to open, keeping surprises inside until Christmas Eve.
Numbering and Decorating
After the compartments are ready, number them from 1 to 24. This represents the days until Christmas. Decorate the calendar with paint, varnish, or wooden carvings for a festive look. You can also add a theme, like a winter wonderland or holiday scene.
Fill the compartments with treats, candies, or notes with activities. This wooden advent calendar will become a cherished holiday tradition. It will create memories that last a lifetime.
By following these steps, you’ll have a beautiful wooden advent calendar. It counts down to Christmas and adds handmade charm to your holiday decor.
DIY Holiday Crafts from Wood That Look Expensive But Cost Little
With a little creativity, you can make holiday decorations that look fancy but are cheap. The trick is to use affordable materials and think outside the box with your design.
Repurpose old or reclaimed wood to make cheap crafts. Look for old pallets, crates, or planks at low prices. Turn an old pallet into a rustic Christmas tree or make a wooden advent calendar.

To make your crafts look fancy, focus on the details. Add ribbons, pinecones, or holly for a festive look. Use wood stain or paint to improve the wood’s color and texture.
Keep your DIY decor simple to save money. Simple designs with clean lines and minimal ornamentation are elegant and cost-effective.
By following these tips, you can make beautiful, high-end-looking DIY holiday crafts from wood without spending a lot. Make a wooden wreath, candle holder, or Christmas tree to achieve a fancy look on a budget.
Other ideas include making wooden gift tags, ornaments, or a nativity scene. You can also use wooden slices to create a beautiful wreath or centerpiece.
In conclusion, making DIY holiday crafts from wood that look fancy but are cheap requires creativity and resourcefulness. Repurpose old wood, focus on details, and keep it simple to create beautiful, affordable holiday decor that will wow your friends and family.
Wooden Candle Holders with Festive Accents
Make your home warm and inviting this holiday season. Use wooden candle holders with festive accents. They add coziness and are a great DIY project for the holidays.

To begin, cut and drill your wooden pieces to the right size. Use a drill press for safety and precision. Cut the wood into sections based on your design.
Sanding and Finishing
After cutting, sand your pieces to smooth out edges. Apply varnish or stain to protect and enhance the wood. Follow the manufacturer’s drying instructions.
Adding Holiday Elements
Once your holders are ready, add festive touches. Use ribbons, pinecones, or holly for a holiday look. You can also paint or decoupage designs for a personal touch.
By following these steps, you can make beautiful wooden candle holders. They’re perfect for your holiday decor and make great gifts for those who love handmade items.
Wooden candle holders with festive accents are easy to make and add warmth to your home. Get creative and enjoy making these special holiday decorations.
Rustic Wood Slice Centerpiece
A rustic wood slice centerpiece adds warmth and coziness to your dining table. It’s made from rustic wood slices, candles, and greenery. This piece is both beautiful and unique.

Start by picking the right wood for your centerpiece. Look for slices that are thick and have a rustic texture. Pine or cedar are great choices for their rustic look. Clean and dry the wood slices before you begin.
Arranging Your Centerpiece
Begin by placing the largest wood slices in the center of your table. Add smaller slices around them for balance. Use a hot glue gun to stick the slices to a base or the table.
Incorporating Candles and Greenery
Add candles and greenery for extra warmth and festivity. Place pillar candles among the wood slices. Make sure they’re stable. Add evergreen branches, holly, or eucalyptus for color and fragrance.
This DIY project makes a stunning centerpiece for your holiday decor. It’s fun and lets you personalize your decor to your style.
Wooden Gift Tags and Ornaments
Make your holiday season more special with DIY wooden gift tags and ornaments. Creating your own wooden gift tags and ornaments is a fun and rewarding project. It adds a personal touch to your holiday gifts and decor.

To get started, you’ll need some basic crafting tools and materials. You’ll need wood slices, a craft knife, sandpaper, and a wood burning tool or paint and stain. Wood burning is a great way to add designs to your wooden gift tags and ornaments.
If you’re new to wood burning, start with simple designs. Practice on a scrap piece of wood before working on your actual project.
Wood Burning Basics
When it comes to wood burning, using the right technique is key. Start by selecting the right wood burning tool for your project. Always follow safety guidelines, such as wearing protective gloves and working in a well-ventilated area.
Painting and staining are also great ways to add color and personality. You can use acrylic paint or stain to create different looks, from rustic to elegant. Try layering colors or using a distressed finish to add depth and interest.
Painting and Staining
To achieve a professional-looking finish, prepare your wood surface properly. Sand the wood to smooth out any rough edges. Apply a primer if necessary. Then, use a high-quality paint or stain to add color and protection.
By following these tips and techniques, you can create beautiful and unique wooden gift tags and ornaments. They will make your holiday season even more special.
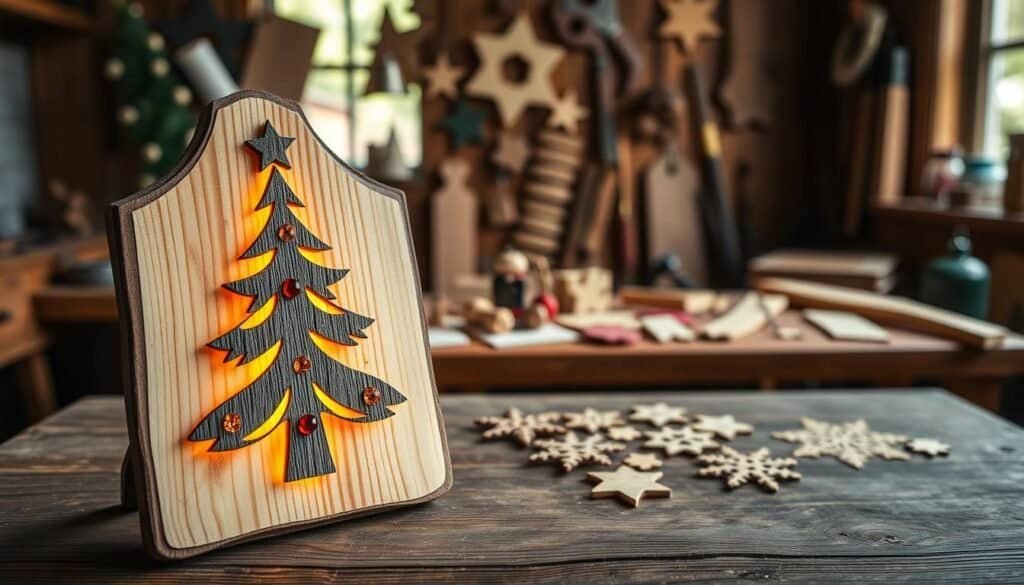
Farmhouse-Style Wooden Signs
Add a touch of rustic charm to your holiday decor with farmhouse-style wooden signs. These signs bring warmth and coziness to your home during the holidays.
Preparing Your Wood Canvas
The first step is to prepare your wood canvas. Choose a wooden plank that fits your desired sign size. Sand it to smooth out any rough edges or surfaces. This ensures a uniform base for your design.

Next, create or choose a design that fits your farmhouse holiday decor theme. You can use stencils or freehand your design onto the wood. To transfer your design, use a pencil to lightly draw it onto the wood, or use transfer paper for more detailed designs.
Painting and Finishing
Once your design is transferred, it’s time to paint. Use colors that complement your rustic wooden decor. Consider adding a distressed finish for a more authentic look. After painting, apply a clear coat to protect your sign and give it a glossy finish.
With these simple steps, you can create beautiful farmhouse-style wooden signs. They add a personal touch to your holiday decor. Whether you hang them on your wall, place them on a mantel, or give them as gifts, these DIY wooden signs are sure to be a hit.
Wooden Snowflake Door Hangers
Add a touch of winter wonder to your home with wooden snowflake door hangers. They are a beautiful and delicate holiday decoration.
Creating wooden snowflake door hangers is a fun and easy DIY project. It adds a personal touch to your holiday decor. You’ll need a few basic materials, like a wooden sheet or panel, a jigsaw or scroll saw, and some decorative items like twine or ribbon.

Start by designing your snowflake pattern on the wooden sheet. You can use a template or create your own design. Then, use a jigsaw or scroll saw to cut out the snowflake shape. Sand the edges to smooth them out and add a coat of finish to protect the wood.
To hang your wooden snowflake, attach a piece of twine or ribbon to the top. You can also add some decorative items like pinecones, holly, or glitter for a more festive look. Wooden snowflake door hangers make a beautiful addition to any holiday decor. They can be customized to fit your personal style.
With these simple steps, you can create your own wooden snowflake door hangers. They add a touch of winter wonder to your home. Whether you’re looking for a fun DIY project or a beautiful holiday decoration, wooden snowflake door hangers are a great choice.
Reclaimed Wood Christmas Card Display
This holiday season, think about making a DIY reclaimed wood Christmas card display. It adds a personal touch to your decor. Plus, it’s good for the planet by using old materials.
To begin, you’ll need some reclaimed wood, nails, a hammer, and a drill. Pick wood that looks natural or has been used before. Its rustic texture and unique look are perfect for Christmas cards.

First, cut the wood into the shape and size you want for your display. You can make a simple frame or something more complex. Use nails to hold the wood together, then add hooks or clips for your cards.
A reclaimed wood Christmas card display is not just beautiful. It’s also a great way to start conversations with guests. It’s a practical and eco-friendly project that warms up your home decor.
Wooden Block Nativity Scene
Create a beautiful wooden block Nativity scene for your home this holiday season. It’s a thoughtful DIY project that the whole family can enjoy.

To start, cut and shape the wooden blocks into characters and a stable. Use woods like pine or cedar for a rustic look.
Cutting and Shaping Blocks
Begin by cutting the wooden blocks into the required shapes and sizes. Use a saw or a craft knife for the shapes.
Character Details
After cutting, add details to the characters, like facial features and clothing. Paint or markers work well for these details.
Creating the Stable
To make the stable, mix wooden blocks with materials like cardboard or fabric. Add a roof or doors for a realistic look.
Assembling the Nativity scene is fun and creative. Arrange the characters and stable to tell the Nativity story. This project is a great way to get into the holiday spirit and decorate your home.
A wooden block Nativity scene is perfect for kids. It teaches them about the Nativity while boosting creativity and fine motor skills.
Wood Slice Photo Ornaments
Create personalized wood slice photo ornaments to add warmth to your holiday decor. These ornaments are beautiful and make great gifts for family and friends.
To make these ornaments, you’ll need wood slices, photos, a hot glue gun, and decorations like ribbons or glitter. First, pick the photos you want and resize them to fit your wood slices.

Put a small amount of hot glue on the back of the photo and stick it to the wood slice. Make sure the photo is centered and smooth out any air bubbles. After the glue dries, add decorations like a ribbon or glitter for a festive look.
These DIY ornaments are perfect for personalizing your Christmas tree. You can also customize them to match your home decor or give them as personalized gifts.
With these easy steps, you can make beautiful wooden ornaments for your holiday tradition. So, get creative and enjoy making wood slice photo ornaments for years to come.
Wooden Holiday Garland
Add a rustic charm to your holiday decor with a wooden holiday garland. This DIY garland can be customized to fit your style. It’s a great way to warm up your home during the holidays.
To make your garland, pick the wood you like. You can choose from pine, cedar, or reclaimed wood. Cut the wood into shapes and sizes, then string them together.

Make your garland more festive by adding pinecones, ribbons, or ornaments. This adds visual interest and makes your garland more dynamic. Mix large and small pieces for a layered look.
A wooden holiday garland is a beautiful addition to your decor. It brings rustic charm to your home. Use it to decorate your mantel, staircase, or Christmas tree.
By making your own garland, you create a unique piece that shows off your style. It adds warmth and coziness to your home during the holidays.
Conclusion: Crafting Memories with DIY Wooden Holiday Decor
Making DIY wooden holiday decor is more than fun. It’s a way to make lasting memories and traditions. By adding handmade wooden decorations to your holiday, you create a cozy and inviting space. It shows off your personal style.
These wooden decorations can become a treasured part of your family’s holiday traditions. They can be passed down for generations. Making something by hand makes the holiday season even more special.
Handmade holiday gifts, like wooden ornaments or decorations, mean a lot. They show you care and are willing to go the extra mile. They’re unique and personalized.
As you start making your own DIY wooden holiday decor, you’ll find joy in it. It brings happiness to your loved ones. So, grab your tools and materials. Get ready to make this holiday season unforgettable.