Sometimes, we just need a quiet project to unwind and be productive. Doing woodwork projects is a great way to spend your weekend diy projects. It lets you create something useful while you relax.
Working on relaxing woodworking ideas helps you step away from daily life’s hustle. It’s a chance to focus on the task, enjoy the process, and feel accomplished by the end of your calm weekends.
This article will look at different DIY projects for your free time. Whether you’re into simple or complex projects, there’s something for everyone. It’s a fulfilling activity for your weekend.
Finding Peace in Woodworking: The Perfect Weekend Activity
Woodworking is a mix of creativity and calm, perfect for weekends. It’s a peaceful DIY project that lets you relax and show your creativity.
Woodworking lets you step away from screens and get back to making things with your hands. It’s a great calm weekend hobby that helps you forget daily worries.

For newbies, starting with simple woodworking projects is a good first step. These projects help you learn new skills and feel proud of what you’ve made.
Adding woodworking to your weekend plans brings joy and fulfillment. It’s a wonderful way to enjoy your free time.
Essential Tools and Materials for Weekend Woodworking Projects
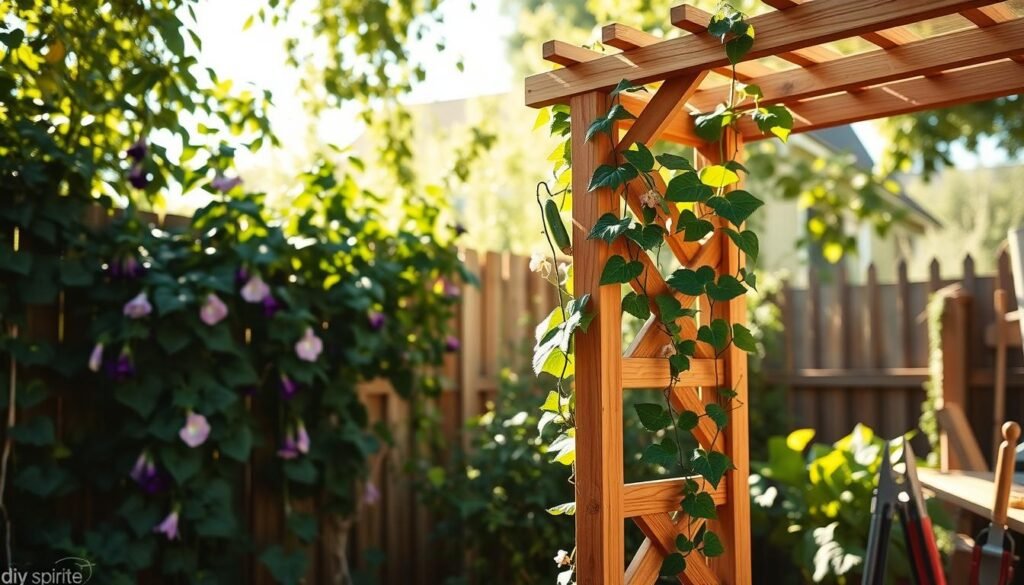
To have a great woodworking experience, you need the right tools and materials. Whether you’re making a woodworking ideas for a table living room or rustic wood picture frames diy, the correct equipment is vital.

For beginners, a basic set of hand tools is a must. You’ll need a tape measure, square, chisel set, hand saw, and a hammer. These tools will help you with simple projects like shelving and more complex ones like a DIY shoe rack on the wall.
Power Tools That Make Projects Easier
Power tools can make woodworking easier. A table saw, drill press, and sander help you make precise cuts and finishes. This makes projects like simple woodwork diagrams easier to complete.
Softwoods vs. Hardwoods: What to Choose When
It’s important to know the difference between softwoods and hardwoods. Softwoods, like pine, are softer and less expensive. They’re great for beginners or projects with less stress on the wood. Hardwoods, such as oak, are denser and more durable. They’re often used for furniture making and projects needing strength.
Budget-Friendly Wood Options
Starting woodworking doesn’t have to cost a lot. Look for wood crafting ideas that use affordable wood. Reclaimed wood is a cost-effective and eco-friendly option. Also, shopping during sales or using less common wood can help save money.
DIY Wood Ideas for Calm Weekends: Beginner-Friendly Projects
For beginners, starting with simple projects is the best way to enjoy a calm weekend. Beginner woodworking projects are easy to do and need little skill. They’re great for a relaxing weekend activity.
Starting with simple wooden crafts like a small birdhouse or a wooden coat rack is a good idea. These projects give you a sense of pride and add a personal touch to your home.

- Building a wooden picture frame
- Creating a small wooden planter
- Making a wooden candle holder
These small wooden projects are perfect for beginners. They need few materials and are quick to finish. They also make great gifts or additions to your home.
To start, make sure you have basic tools like a saw, sandpaper, and a drill. Online tutorials or DIY guides can help you complete your projects well.
By doing these DIY wood projects, you create something with your own hands. You also have a calming and fulfilling weekend.
Relaxing Furniture Projects to Transform Your Living Space
DIY woodworking lets you make beautiful and useful items for your home. It’s great for a relaxing weekend.

Creating a DIY wood couch table or a DIY weekend project is a good start. These projects add both function and style to your space.
Materials and Cutting List
To start, you need a list of materials and a cutting plan. For a simple couch table, you’ll need wooden planks, screws, and a drill. Having a detailed cutting list helps save time and reduces waste.
Assembly Steps for a Stress-Free Build
Here are the steps for a stress-free build:
- First, cut your materials as planned.
- Then, build the frame with screws and a drill.
- Lastly, add the tabletop and any final touches.
Finding and Preparing Reclaimed Materials
Reclaimed wood adds charm to your project. Look for old pallets or wooden crates. Clean and prepare the wood before using it.
Construction Tips for Stability and Style
For stability and style, keep these tips in mind:
- Use strong joints and secure fasteners.
- Choose a finish that matches your decor.
- Focus on the proportions for balance.
By following these tips, you can make a beautiful and useful piece of furniture. Whether it’s a DIY wood couch table or something else, the process is calming and rewarding.
Rustic Picture Frames: Preserving Memories with Wood
With just a few tools, you can make stunning rustic picture frames to hang on your walls. These frames, crafted from wood, bring warmth and character to any space. They’re ideal for showing off your favorite photos.

To get that rustic look, try weathering the wood. Use sandpaper or a wire brush to distress it. This method gives your frames a vintage vibe that fits well with rustic decor.
Mounting and Finishing Your Frame
After building your frame, it’s time to mount your picture and finish it. Use a strong backing and hold it in place with framing nails. Then, apply a finish like varnish or stain to protect the wood and highlight its grain.
Safe Pallet Selection and Preparation
When working with pallet wood, pick pallets safe for indoor use and free from chemicals. Disassemble the pallet carefully and clean the wood well. This is key to making a frame that’s both beautiful and long-lasting.
Creating a Gallery-Style Arrangement
To make your display eye-catching, try a gallery-style setup. Mix frame sizes and shapes for interest. Experiment with different layouts until you find one that fits your space perfectly.
By following these steps, you can craft gorgeous rustic diy picture frames. They not only keep your memories safe but also add a personal touch to your home. Whether you use reclaimed wood or new lumber, your frames will show off your skill.
Functional Storage Solutions for Every Room
Every room can benefit from good storage solutions. These should be both useful and look nice. Whether it’s your bathroom, laundry room, or any other space, a well-thought-out storage system can really help.
Building custom shelving or storage towers is a great way to improve storage. For example, a DIY bathroom storage tower can keep toiletries and towels handy while keeping things tidy.
Space-Saving Measurements and Plans
Before you start, take accurate measurements of the space. Think about the size and layout to make sure your DIY linen tower or storage fits perfectly.
- Measure the width and height of the area.
- Plan the depth based on the items you intend to store.
- Choose materials and design that match your decor.

- Use wall anchors for added stability, even for tall units like a DIY bathroom linen cabinet.
- Pre-drill holes to avoid splitting the wood.
- Tighten screws firmly to secure the unit to the wall.
Moisture-Resistant Wood Selection
In moist areas like bathrooms and laundry rooms, choose the right wood. Opt for woods like cedar or teak that resist moisture well. This will help your storage last longer.
Customizing Shelves for Your Specific Needs
Customizing your shelves lets you tailor storage to your needs. For instance, adjust the height of shelves in your laundry basket tower plans for different sizes of items.
- Consider adjustable shelving for flexibility.
- Use baskets or bins for smaller items.
- Label shelves for easy identification.
By following these tips, you can make storage solutions that are both useful and stylish. This includes a DIY tower shelf that adds both storage and style to your home.
Decorative Wooden Signs and Planters
Welcome warmth and character into your home with DIY decorative wooden signs and planters. These projects add a personal touch and let you get creative.

Making a wooden welcome sign with planter is a great way to make your home’s entrance special. It’s perfect for those who want to try woodworking and decoration.
Lettering Techniques for Beginners
For beginners, starting with simple lettering techniques is rewarding. Use stencils or freehand methods to add personalized messages to your wooden signs.
Plant Selection for Year-Round Appeal
Choosing the right plants for your planters is key for year-round appeal. Pick plants like succulents or evergreens that stay attractive all year.
Template Creation and Transfer
To get precise designs, make a template for your wooden signs. Use cardstock or cardboard for the template and transfer it to your wood with tracing or carbon paper.
Finishing Options for Different Decor Styles
The finish you choose greatly affects your wooden signs and planters’ look. For a rustic look, go for a distressed finish. For modern decor, a sleek, painted finish works best.
Whether you’re making a planter welcome sign diy or a DIY wooden Christmas tree, the most important thing is to have fun and be creative. These projects are great gifts and add a personal touch to your home decor.
- Choose your wood type based on the desired finish and durability.
- Experiment with different lettering styles to add a personal touch.
- Consider the size and scale of your project to ensure it fits your intended space.
Musical Instrument Holders and Displays
Musical instruments are more than tools for music; they’re valuable items that deserve care. Making a holder or display for them can be a fun DIY project. You might want to build a diy wooden guitar stand or a rustic guitar case project. The goal is to keep your instrument safe and look great.

When making a holder or display, safety comes first. Think about your instrument’s size, weight, and material. This helps you make a holder that supports it well. For example, a wood love shelf is a stylish way to show off smaller instruments or music gear.
Adding Protective Padding
Protective padding is key to avoid damage to your instruments. Use foam or felt to cushion them and prevent scratches. This is very important for delicate or valuable instruments.
Secure Mounting Systems
A secure mounting system is vital to keep your instrument holder or display stable. Use strong brackets or mount it to the wall. For example, a well-mounted rustic guitar stand project can be both a decorative piece and a safe place for your guitar.
Customizing for Different Instrument Types
Different musical instruments need different holders and displays. For example, a violin needs a different holder than a guitar. Customizing your DIY project to fit your instrument’s needs ensures it’s both safe and looks good.
By following these tips, you can make a beautiful and useful musical instrument holder or display. It will show off your instrument while keeping it safe. Whether you’re an experienced musician or just starting, a well-designed holder or display can make your music experience better.
Holiday-Themed Wooden Crafts
Wooden Christmas decorations are a big part of holiday decor. Making your own can be a fun weekend project. It’s a great activity for the whole family.

One easy DIY project is a wooden Christmas tree display. You can use wooden planks or reclaimed wood. This makes a unique and rustic stand.
Simple Triangle Designs for Beginners
Beginners should start with simple triangle designs. You can make a DIY large wooden Christmas tree by stacking wooden triangles. This creates a beautiful and sturdy centerpiece.
Decorative Embellishments and Lighting
To add elegance, use decorative embellishments and lighting. String lights, garlands, or ornaments can make your wood Christmas tree festive.
Template Patterns for Easy Cutting
Using template patterns makes cutting designs easier. You can find templates online or make your own. This helps you get precise cuts and saves waste.
Painting and Finishing Techniques
After cutting, add a finish. Paint, varnish, or stain protect the wood and enhance its look. Choose eco-friendly finishes for a sustainable choice.
By following these tips, you can make beautiful holiday-themed wooden crafts. They will add a personal touch to your Christmas.
Creative Ways to Use Wood Scraps and Pallet Materials
Wood scraps and pallet materials are not just waste; they’re a treasure trove for DIY enthusiasts. With a bit of creativity, you can transform these materials into beautiful and functional pieces for your home.
One of the simplest ways to reuse wood scraps is by creating scrap wood crafts. You can make decorative items like wooden signs, candle holders, or picture frames. These projects not only reduce waste but also add a personal touch to your living space.
Pallet materials, on the other hand, offer a wide range of possibilities. You can create pallet shelves for your bathroom, adding a rustic touch while providing additional storage. Other ideas include pallet coffee tables, headboards, or even outdoor furniture.

When working with wood scraps and pallet materials, it’s essential to clean and prepare them properly. Remove any nails, sand the surfaces, and cut them into manageable sizes. This preparation will make your DIY projects safer and more enjoyable.
Some other cool wood projects include creating a wooden planter box, a coat rack, or a wooden bench. These projects are not only functional but also serve as decorative elements in your home.
- DIY upcycling of old pallets into bathroom storage units
- Creating wooden signs with inspirational quotes
- Building pallet shelves for your living room or kitchen
By embracing DIY upcycling, you not only reduce waste but also create unique pieces that reflect your personal style. So, next time you’re about to throw away wood scraps or old pallets, consider the creative possibilities they hold.
Conclusion: Embracing the Calm of Woodworking Weekends
Woodworking is a peaceful escape from daily life, making it a perfect hobby for weekends. It lets you create beautiful things that make you feel proud and relaxed.
There are many projects you can try, from simple to complex. You can make useful items or decorative signs. Woodworking is a way to express yourself and relax at the same time.
Begin with easy projects and then try harder ones. Each project helps you create something special and brings calm. So, get your tools ready, choose a project, and enjoy the calm of woodworking on your weekends.