Changing your living space doesn’t always mean a big change. A single handmade piece can change how a room feels, making it cozier and more welcoming.
Using DIY wood elements in your decor is a great way to add warmth. Wood naturally brings comfort and character to any room.
With the right wood projects, you can improve your home’s feel without a full redesign. Whether you want a bold statement or a touch of warmth, DIY wood projects are a creative and versatile choice.
The Transformative Power of Wood in Home Decor
Wood can turn a house into a home, adding warmth and character. It’s a popular choice for home decor because of its versatility. You can use it for furniture making or creating decorative elements.
If you’re new to woodworking for beginners, start with simple projects. Wooden coat racks or shelves are great for beginners. For those with more experience, try creative wood projects like detailed wall art or custom furniture.

- Adding wooden accents to walls
- Creating a wooden headboard
- Using reclaimed wood for a unique coffee table
Wood is perfect for any room, whether you want simple wood projects or wood crafting ideas. It makes any room feel cozier and more welcoming.
Wood Projects That Add Warmth Without Redecorating: Getting Started
DIY wood projects are a great way to warm up your home. They add character without needing to redecorate. Getting started is simple. First, learn about the basic tools needed for these projects.
Must-Have Hand Tools and Power Tools That Make the Job Easier
For simple projects, the right hand tools are key. You’ll need a tape measure, marking gauge, and chisels. These help you measure, mark, and shape your wood.
Power tools are also important. For small projects, a circular saw for cutting, a drill press for precise drilling, and a sander for smooth surfaces are essential.
Here are some key tools to get started with your wood projects plans:
- Tape measure
- Marking gauge
- Chisels
- Circular saw
- Drill press
- Sander

With these tools and a bit of knowledge, you can start making beautiful wood projects. They will add warmth and character to your home.
Rustic Wooden Picture Frames: Showcase Your Memories
Rustic wooden picture frames are a great way to display your favorite memories. Making your own can be a fun DIY project. It adds warmth to any room.
To begin, pick the right wood for your project. Rustic wood is perfect because of its natural look and imperfections. You can use reclaimed barn wood, cedar, or pine. Each wood type adds its own rustic charm to your frames.
Staining Options for Different Wood Types
The stain you choose depends on the wood type. Cedar and pine can be stained in many colors to highlight their beauty. Reclaimed barn wood looks best with a subtle stain that shows off its texture.
- Light Stain: Creates a bright, airy feel.
- Dark Stain: Adds depth and richness.
- Weathered Stain: Gives a distressed, aged look.
Distressing Methods for Authentic Rustic Appeal
Distressing your frames adds to their rustic charm. You can use a wire brush to distress the wood or sand the edges for a worn look. Small dents and imperfections can be made with a hammer.

By choosing the right wood, stain, and distressing techniques, you can make stunning rustic wooden picture frames. They will showcase your memories in a unique and personal way.
DIY Wooden Couch Side Table: Functional Elegance
Add a touch of warmth and sophistication to your living space with a DIY wooden couch side table. This project not only enhances the aesthetic appeal of your living room but also provides additional functionality.

When building your DIY project, choosing the right finish is key. The finish greatly affects the table’s look and feel.
Finish Options for Different Decor Styles
- Modern Minimalist: A sleek, matte finish in a neutral tone can blend seamlessly with modern decor.
- Rustic Charm: A distressed or reclaimed wood finish can add a cozy, vintage feel to your living room.
- Elegant Sophistication: A polished, high-gloss finish can elevate the table’s elegance, making it a focal point in the room.
By selecting the appropriate finish for your couch table plans, you can ensure that your DIY project harmonizes with your home’s style. Whether you’re going for a rustic, modern, or elegant look, the right finish will enhance both the functionality and beauty of your DIY couch end table.
For more woodworking ideas for a table living room, consider exploring different wood types and designs. Find what best suits your space and personal taste.
Wall-Mounted Wooden Shoe Rack: Practical Organization
Looking to save space? A DIY wall-mounted wooden shoe rack is perfect. It keeps your shoes tidy and adds warmth to your entryway or closet.

Making a DIY wall-mounted wooden shoe rack is easy and needs just a few materials. You can pick from simple to complex designs, based on your skill and home style. The best part? It keeps your shoes off the floor, making your space look bigger.
Adapting the Design for Different Family Sizes
Building your own shoe rack lets you tailor it to your family’s size. For big families, make it longer or add more tiers. Smaller homes can opt for a compact, simpler design.
- Measure the space for your shoe rack to find the perfect size.
- Pick wood that fits your home’s look and is strong enough.
- Think about adding a finish or stain to protect and beautify the wood.
With these steps, you can make a DIY floating shoe rack. It’s both useful and stylish. Whether you want a DIY shoe rack on wall or something more, this project is a great DIY start.
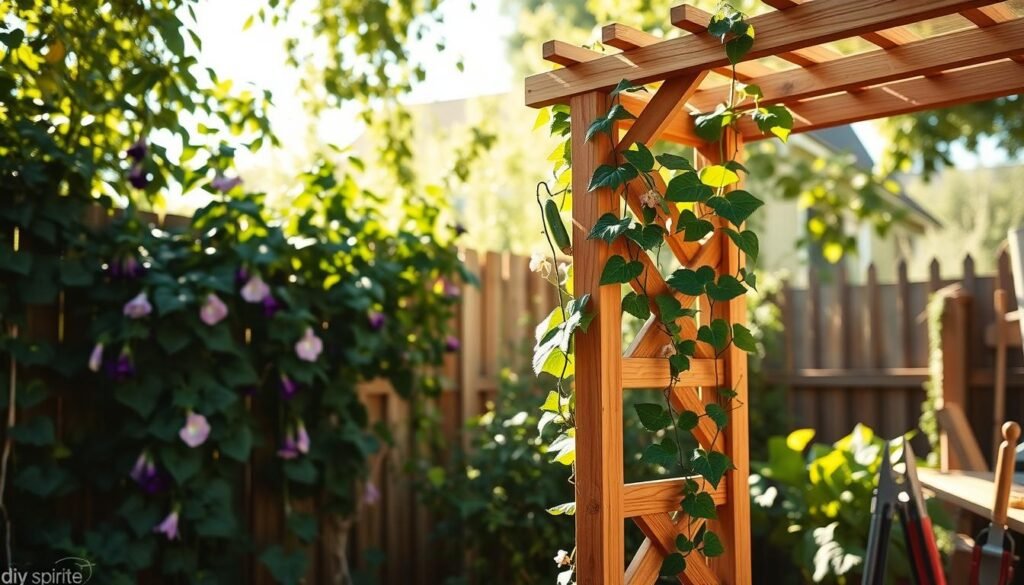
Wooden Welcome Sign with Planter: Greet Guests with Greenery
A wooden welcome sign with a planter is a great addition to your home’s exterior. It combines functionality with a warm welcome for your guests. This project mixes the charm of a wooden sign with the beauty of greenery, making your home feel welcoming.
Begin by picking a durable wood type like cedar or pine that can handle outdoor weather. Design your sign with a built-in planter that’s big enough for your plants. You can also add a personal touch with engravings or a special message.

To keep your wooden welcome sign with a planter looking good, apply a weatherproof sealant. This protects the wood from moisture and UV damage. Also, check the sign and planter often for any wear and tear.
- Use a waterproof glue for assembling the planter.
- Apply multiple coats of sealant for maximum protection.
- Choose plants that are suitable for outdoor conditions and require minimal maintenance.
By following these tips, your DIY wooden welcome sign with a planter will last for years. It will add a warm and inviting touch to your home’s exterior.
Bathroom Storage Tower from Reclaimed Wood: Elegant Utility
Reclaimed wood bathroom storage towers mix rustic charm with modern use. They are eco-friendly and look great. This makes them a smart choice for your bathroom.
Adding a reclaimed wood tower brings warmth and character to your bathroom. The wood’s natural look fits many styles, from modern to traditional.
Benefits of Reclaimed Wood
- Eco-friendly
- Unique character
- Durable
Decorative Elements to Match Your Bathroom Style
To make your storage tower fit your bathroom, add decorative touches. Think about metal hardware, glass knobs, or trim that matches your style.

These elements help create a unified look in your bathroom. A reclaimed wood tower works well with many styles. It’s both stylish and useful.
Wooden Guitar Holder and Display: Showcase Your Instruments
Showing off your guitar on a wooden holder is a beautiful way to share your love for music. ADIY wooden guitar holderis not just useful but also warms up your home. It’s perfect for both seasoned musicians and music lovers, adding a personal touch to your space.
To make a rustic guitar stand project, use reclaimed wood or solid oak for a sturdy look. You can keep the design simple or make it more complex, based on your skill and taste.

After making your guitar holder, add some ambient lighting to make it stand out.
Adding LED Lighting for Dramatic Effect
Putting LED lighting under or around your guitar holder can make it look amazing. Use a simple LED strip that runs on USB or batteries.
- Choose a warm white LED tone to match the wood.
- Make sure the lighting isn’t too harsh to protect the instrument.
- Try different lighting placements to get the look you want.
By making aDIY wooden guitar rackor holder, you’re not just showing off your guitar. You’re adding a piece of art to your home. This project is both useful and beautiful, making it a great choice for any music enthusiast’s home.
Pallet Wood Bathroom Shelving: Upcycled Charm
Turn old pallets into useful bathroom shelving for a green home makeover. This project brings warmth and a special storage spot to your bathroom. It also makes your home decor more eco-friendly.

To keep your pallet wood shelving safe in the bathroom, use safe sealing methods. Sealing the wood keeps it safe from moisture damage. Use a water-resistant sealant or varnish to protect it from humidity and water.
Safe Sealing Methods for Bathroom Environment
- Choose a water-resistant sealant for bathroom use.
- Apply thin coats, letting each dry before adding the next.
- Make sure the wood is dry and dust-free before sealing.
By doing this, your DIY pallet wood bathroom shelving will last for many years. It looks great and is very useful. Pallet bathroom ideas like this make your home look better and help the planet.
Scrap Wood Projects: Making the Most of Leftovers
With a little creativity, you can turn scrap wood into unique pieces. These pieces can make your home warmer and more characterful. Scrap wood crafts are a great way to upcycle leftover materials into useful and decorative items.
Coasters and Trivets, Wall Art and Decorative Pieces
Here are some exciting projects you can try:
- Make coasters and trivets to protect your furniture from water marks and spills.
- Create wall art and decorative pieces to add a personal touch to your home.
- Build wooden candle holders and centerpieces for a cozy ambiance.
These DIY upcycling projects not only cut down on waste but also add beauty to your space. By using wood scraps, you can make cool wood projects that are both useful and look great.

Other ideas for scrap wood projects include building a wooden headboard, creating a wooden mirror frame, or making a wooden coat rack. The possibilities are endless. With a bit of imagination, you can turn leftover wood into beautiful and useful items for your home.
Decorative Wooden Christmas Trees: Holiday Warmth
As the holiday season comes, many of us seek unique home decorations. A decorative wooden Christmas tree is a great choice. It’s a fun and creativeDIY project that lets you express your style.
You can craft awooden Christmas tree diyusing different woods and designs. For instance, awooden christmas trees diy triangletree made from wooden triangles is eco-friendly and adds a rustic charm.
Lighting Options for Evening Ambiance
To enhance your wooden Christmas tree’s warmth and ambiance, think about lighting. String lights or fairy lights can create a cozy glow. This highlights the tree’s beauty and makes your home feel welcoming.
Year-Round Display Variations
A wooden Christmas tree is versatile, lasting beyond the holiday season. It can be a year-round decoration or awooden christmas tree displayfor your favorite ornaments.

Making a decorative wooden Christmas tree is a fun DIY project. It adds a unique touch to your home decor. Whether it’s adiy large wooden christmas treeor a smaller one, it’s sure to spark conversations during the holidays.
Conclusion: Bringing Natural Warmth to Your Home Through Handcrafted Wood Elements
DIY wood projects can make your home feel warmer and more unique. You can create everything from rustic picture frames to stylish bathroom shelves. Each project lets you add a personal touch to your space.
Woodworking projects, like making things from 2x4s or pallets, let you show off your creativity. They also give you beautiful, useful items for your home. Whether you’re experienced or just starting, making something with your hands is incredibly rewarding.
If you want to get better at woodworking, try a project with labeled parts or take a class. Woodworking offers endless chances to add warmth and beauty to your home.
By choosing handcrafted wood elements, you can make your home cozy and welcoming. It will show off your personal style in a beautiful way.