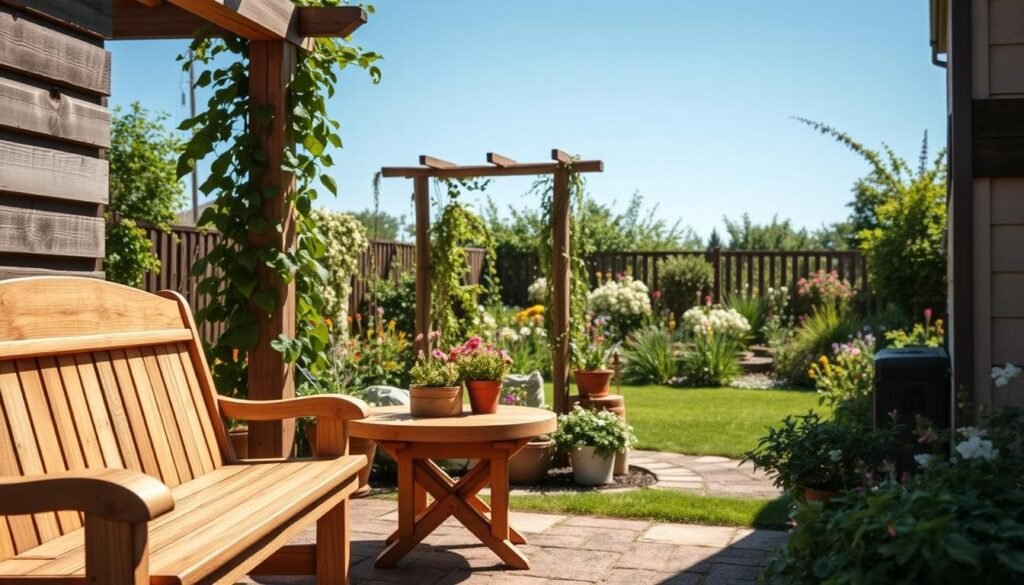
Welcome to our guide on rustic seasonal wood décor. We’ll show you how to make your home more charming all year round.
From wood wall art to rustic wooden lanterns, we’ll explore DIY wood crafts and home décor ideas.
These projects will bring warmth and coziness to your home. They’re perfect for any season.
The Timeless Appeal of Rustic Wood Décor
Rustic wood decor brings the outdoors into our homes, making them cozy and inviting. It makes any space feel welcoming and real.

Rustic wood decor is more than just looks. It tells a story with each piece. Many items are reclaimed or come from nature, adding a unique history and character.
Rustic wood decor fits many decorating styles. It works in living rooms, bedrooms, and kitchens. This makes it a favorite choice for many.
Adding rustic wood decor to your home makes it warm and inviting. It connects your space to nature. Whether it’s furniture, wall decor, or other items, rustic wood decor enhances your home’s feel.
Essential Tools and Materials for Rustic Wood Projects
Before starting your DIY wood crafts, make sure you have the right tools and materials. The right equipment is key to making your projects look great and last long.
For woodworking, you’ll need basic tools like a saw, drill, and sandpaper. A tape measure and square are also important for precise cuts. If you’re using reclaimed wood, you might need a pry bar and hammer to take apart old wood.

When picking materials, you can choose from different woods like pine, cedar, or cypress. These woods vary in look and durability. For unique pieces, consider using old pallets or fencing. Reclaimed wood from old barns or buildings adds a special touch to your decor.
Don’t forget nails, screws, and wood glue for your projects. You might also want to add finishes like stain or sealant. These protect your wood and make it look even better.
With the right tools and materials, you’re ready to create stunning rustic wood decor. It will bring warmth and character to any room.
10 Rustic Seasonal Wood Décor Projects That Never Go Out of Style
Here are 10 rustic seasonal wood décor projects to enhance your home’s look all year. These projects are timeless and fit many seasons and styles.

These projects use wood in creative ways, like wall art and lanterns. You can change them to match your style and the season.
There’s a mix of useful and decorative items, like candle holders and picture frames. Each piece adds rustic charm to your home.
Project 1: Reclaimed Wood Wall Art with Seasonal Accents
Adding seasonal accents to reclaimed wood wall art is a simple yet effective way to keep your home decor fresh and exciting. This project allows you to create a unique piece that reflects your personal style and complements your home’s rustic charm.
Wood Selection and Preparation
The first step in creating your reclaimed wood wall art is selecting the right wood. Look for reclaimed beams or planks that have character and history. Clean and prepare the wood by removing any dirt or debris, and sanding it to a smooth finish.
Consider the size and shape of your wall art. You can create a large statement piece or a smaller, more intricately designed piece. The key is to choose wood that is sturdy enough to hold its shape and any additional decorative elements you plan to add.

To hang your wall art, you’ll need sturdy hardware. Choose brackets or a French cleat that can support the weight of your reclaimed wood. For seasonal accents, consider items like pinecones, holly, or flowers that can be attached or arranged on your wall art.
Assembly and Construction
Assemble your wall art by arranging the reclaimed wood pieces into your desired design. Use nails, screws, or wood glue to secure the pieces together. Make sure the structure is stable and can be hung safely.
Finishing Touches
Lastly, add your seasonal accents and apply a finish to protect the wood. You can use a clear coat or a stain to enhance the wood’s natural beauty. Hang your reclaimed wood wall art in a prominent place, and enjoy the warmth and character it brings to your home.
By following these steps, you can create a beautiful piece of reclaimed wood wall art that becomes a focal point in your home, adaptable to the changing seasons.
Project 2: Rustic Wooden Candle Holders for Year-Round Ambiance
With just a few tools and some rustic wood, you can make candle holders. These holders add warmth to your home. They’re great for any room, creating a cozy glow all year.

Start by picking the right wood. Look for woods that look natural, like reclaimed barn wood. Clean and sand the wood to get rid of rough spots.
Safety Considerations
When using candles, safety is key. Make sure your holders are stable and won’t fall. Use a flame-safe material for the base. Never leave candles burning alone.
Cutting and Shaping
Cut your wood to the right size for your holders. Use a saw to shape them, then sand the edges. You can add carvings or metal straps for a special look.
Creating Candle Recesses
To make spaces for candles, drill or jigsaw holes that fit the candle. Sand the edges so they’re smooth and won’t hurt the candle.
By following these steps, you can make stunning rustic wooden candle holders. They add warmth and style to your home. These DIY projects are great for anyone wanting to decorate with unique wood pieces.
Project 3: Weathered Wood Picture Frames with Interchangeable Displays
A weathered wood picture frame brings warmth to any room. It’s a unique and rustic décor piece that you can update easily.
Wood Selection and Preparation
Start by picking the right wood for your frame. Reclaimed or distressed wood gives it a weathered look. If you can’t find this type, you can distress new wood.
After choosing your wood, clean and sand it. This removes debris and rough edges.

Choose between regular glass or acrylic for the frame’s glass. The backing can be plywood or MDF. It must be sturdy for the frame’s weight and display.
Cutting and Assembly
Cut the wood for your frame design. Use a saw that fits the wood type. Assemble it with wood glue and nails or screws. Ensure the corners are tight and the frame is even.
Weathering Techniques
To get the weathered look, apply wood stain or use a wire brush. You can also add whitewash for an aged look. Try different methods to find your perfect rustic frame.
By following these steps, you’ll make a beautiful DIY reclaimed wood picture frame. It adds rustic charm to your home. Plus, you can change the displays seasonally to keep your décor fresh.
Project 4: Barn Wood Floating Shelves for Seasonal Vignettes
Rustic barn wood floating shelves can instantly elevate the ambiance of any room with their unique character. These shelves are perfect for creating seasonal vignettes that reflect your personal style.
Wood Selection and Preparation
When selecting barn wood for your floating shelves, look for planks with interesting textures and character marks. Proper preparation involves cleaning the wood thoroughly and checking for any damage or rot.

The right mounting hardware is key for the stability and safety of your barn wood floating shelves. Choose heavy-duty brackets that can support the weight of the wood and any items you plan to display.
Cutting and Sanding
Cutting and sanding are critical steps in preparing your barn wood for shelving. Use appropriate safety gear when cutting, and sand the wood to smooth out any rough edges or surfaces.
Installation Methods
For a seamless look, consider using hidden installation methods such as French cleats or concealed brackets. Ensure that your shelves are level and securely attached to the wall studs.
By following these steps, you can create beautiful barn wood floating shelves that add a touch of rustic charm to your home decor. Whether you’re displaying seasonal decorations or everyday items, these shelves are sure to become a focal point in any room.
Project 5: Rustic Wood Centerpiece Box with Seasonal Fillers
Make your home look great with a handmade rustic wood centerpiece box. It’s perfect for showing off your favorite decorations. This box fits any season, adding charm to your space.

Start by picking the right wood for your box. Look for reclaimed or distressed wood for that rustic feel. Make sure it’s dry and clean. Cut it to the size you need for your box.
Assembly Hardware
You’ll need nails or strong glue to put your box together. Use decorative nails or metal straps for extra charm. Choose rust-resistant hardware for lasting quality.
Cutting and Assembly
After cutting the wood, sand the edges to smooth them. Use your chosen hardware to put the box together. It should be strong to hold your decorations.
Finishing Options
You can keep the wood natural for a rustic look or add a finish. Use natural wax or oil to protect and enhance the wood. This makes cleaning and upkeep easier.
After finishing your box, fill it with seasonal items like pinecones, candles, or evergreen branches. It becomes a beautiful, changing piece of décor for every season.
Project 6: Wooden Door Wreath Hanger with Interchangeable Elements
A wooden door wreath hanger is a great way to show off your creativity. It’s perfect for your home’s exterior. You can change it up with the seasons, keeping your porch looking fresh.

Start by picking the right wood for your wreath hanger. Reclaimed or rustic wood adds a special touch. Clean and sand the wood to make it smooth.
Hardware and Hanging Mechanisms
Choose strong hardware that can hold your wreath’s weight. It should also handle the weather well. Decorative hooks or brackets can make it look nicer.
Cutting and Shaping
Cut your wood to the right length and shape it as you like. You can use a saw or jigsaw, depending on your design.
Adding Hanging Hardware
Put the hardware on your wreath hanger securely. This makes sure your wreath hangs well.
Now, you can change out your wreath hanger with the seasons. It’s a great way to add to your Christmas decor. Your guests will love it.
Project 7: Reclaimed Wood Serving Tray for Seasonal Entertaining
Create a stunning reclaimed wood serving tray to elevate your seasonal entertaining. This project combines functionality with rustic charm, making it a perfect addition to any gathering.

Choosing the right wood is key for a reclaimed wood serving tray. Opt for woods like oak or pine that have a rich, rustic character. Make sure the wood is properly cleaned and prepared to avoid damage or warping.
Inspect the wood for any nails or debris and remove them. Sand the wood to smooth out the surface, preparing it for assembly.
Handle Options and Hardware
The handles or hardware you choose can significantly impact the tray’s overall look. Consider using metal or wooden handles that complement the rustic theme. Ensure they are securely attached to withstand regular use.
Cutting and Assembly
Cut the wood into the required dimensions for your serving tray. Assemble the pieces using appropriate joinery techniques, such as mortise and tenon or simple butt joints, depending on the design complexity.
Food-Safe Finishing
Apply a food-safe finish to protect the wood and ensure it’s safe for serving food. Options include mineral oil or beeswax. Avoid using varnishes or polyurethane that may contain harmful chemicals.
Once the finish is applied and dried, your reclaimed wood serving tray is ready for use. It’s perfect for serving appetizers, desserts, or any other dishes during your seasonal gatherings.
By following these steps, you’ll create a beautiful and functional reclaimed wood serving tray that adds a touch of rustic charm to your entertaining.
Project 8: Rustic Wooden Lanterns with Seasonal Illumination
Creating your own rustic wooden lanterns can add a warm glow to your home. These lanterns not only light up a room but also become a beautiful centerpiece. They look even more stunning when decorated with seasonal items.
Wood Selection and Preparation
Start by picking the right wood for your lanterns. Reclaimed or distressed wood gives them a rustic charm. Make sure the wood is dry and has no damage. Cut it into the right sizes for your lantern.
Glass and Lighting Components
For the glass part, use old glass jars or buy glass panels that fit your design. LED candles or fairy lights are great for a warm, safe light. They save energy and come in many colors to match your decor.

Next, cut the wood into the pieces you need for the frame. Use wood glue and nails to put it together. Make sure it’s strong enough to hold the glass and lights.
Installing Glass and Lighting
After the frame is built, put in the glass panels or jars. Add your chosen lights inside, and your lantern is set. You can decorate it with seasonal items like pinecones, ribbons, or ornaments for extra flair.
Rustic wooden lanterns with seasonal lights are a great decor item for all year. Just change the decor inside or around it to match any season. This makes them a valuable part of your home’s decor.
Project 9: Wooden Sign with Interchangeable Seasonal Messages
Welcome guests and celebrate the seasons with a beautifully crafted wooden sign. It features interchangeable messages. This project adds a personal touch to your home decor and shows off your creativity.
Wood Selection and Preparation
The first step is to pick the right wood. Use reclaimed or rustic wood for a unique, weathered look. Clean and sand the wood to smooth out any rough edges.

Choose the lettering and design for your sign. You can use stencils or paint. Mix fonts and colors to make it visually appealing. Make sure it fits your home’s rustic decor.
Base Sign Construction
Build the base of your sign using the prepared wood. You can go for a simple shape or something more complex. The base should be sturdy enough for the interchangeable elements.
Creating Interchangeable Elements
The interchangeable elements are the project’s heart. Design and create inserts with different seasonal messages. Use a sturdy material that’s easy to swap out. Consider laminating your inserts to protect them from dust and wear.
By following these steps, you can make a beautiful wooden sign with interchangeable seasonal messages. It will become a focal point in your home. This project adds to your rustic wood decor and lets you celebrate the changing seasons in a unique way.
Project 10: Rustic Wood Mantel or Window Box for Seasonal Displays
Building a rustic wood mantel or window box brings seasonal charm to your home. These pieces are great for showing off your favorite seasonal items. Think festive holly, pinecones, vibrant flowers, and greenery.

Choosing the right wood is key for your project. Opt for reclaimed or distressed wood for its unique look and feel. Clean and sand the wood to make it smooth.
Mounting Hardware
For a secure hold, pick strong mounting hardware. It should support the wood and any decorations you’ll add.
Cutting and Assembly
Follow your design to cut the wood. Use nails, screws, or wood glue to put it together. Make sure it’s sturdy for your decorations.
Weatherproofing (for Window Boxes)
Window boxes need a weatherproof coat to last. Use a waterproof sealant or stain to keep the wood strong.
By following these steps, you’ll have a beautiful rustic wood mantel or window box. It will add charm to your home. Whether it’s for festive decorations or flowers, it will spark conversations.
Finishing Techniques for Authentic Rustic Wood Projects
To get a real rustic look, you need the right finishing techniques for your wood projects. Rustic wood’s natural beauty shines through with different methods. These include distressing and the right finishes.
Distressing makes rustic wood look weathered and old. You can do this by sanding, hammering, or using a wire brush. These methods create scratches and dents on the wood’s surface.
Choosing the right finishes is key to highlighting rustic wood’s natural texture. Natural oils, waxes, and stains protect the wood while keeping its rustic charm. For instance, a clear wax finish protects the wood while keeping its natural color and texture.

Other techniques like whitewash or liming finishes also enhance the rustic look. These involve applying a thin layer of paint or a lime-based finish. This lets the wood’s natural texture show through.
Using the right finishing techniques makes your rustic wood projects truly stand out. Whether it’s a rustic candle holder or a reclaimed wood wall art, the finish makes a big difference. It brings out the wood’s natural beauty.
Styling Your Rustic Wood Décor Throughout the Seasons
Rustic wood décor is versatile, making it easy to update your space with the seasons. You can add seasonal touches to your rustic wood projects. This keeps your home welcoming and stylish all year.
For spring, add flowers or greenery to your rustic wood pieces. A vase with fresh flowers on a rustic console table or a potted plant on a barn wood shelf brightens your space.

In summer, bring in nautical or beach themes. Place a bowl of seashells on a rustic coffee table or hang a summer wreath on your wooden door hanger.
Autumn brings warmth with décor like pumpkins, leaves, or warm candles on your rustic centerpiece box or mantel. Winter calls for festive touches like holly, pinecones, or fairy lights on your rustic wood pieces.
Adapting your rustic wood décor to the seasons makes your home lively and engaging. This approach to rustic home decorating keeps your space looking new. It also lets you enjoy each season’s unique charm.
Preserving and Maintaining Your Rustic Wood Projects
Keeping rustic wood beautiful needs the right care and upkeep. To make your rustic wood projects last, knowing how to maintain them is key.
Cleaning is the first step in keeping your rustic wood décor looking good. Use a soft, dry cloth to wipe away dust or dirt. For deeper cleaning, a damp cloth works, but don’t soak the wood to avoid harm.
It’s also important to protect your rustic wood from the environment. Sunlight can fade it, so apply a UV-resistant finish. Keeping your home’s humidity stable also helps prevent warping or cracking.
Restoring your rustic wood décor is possible by reapplying a finish or using a wood conditioner. Regular checks can spot areas needing restoration early, preventing bigger problems.
By following these easy care and maintenance tips, you can enjoy your rustic wood projects for many years. This way, you keep their beauty and extend their life.
Conclusion
Creating rustic seasonal wood décor projects is a fun way to make your home more charming. This article has shown you 10 timeless projects to get started on your next DIY wood craft. Now, you have the tools and inspiration to begin.
These projects, from reclaimed wood wall art to rustic wooden lanterns, offer many creative ways to add rustic wood décor to your home. By using the techniques and styling ideas shared, you can enjoy the beauty of rustic wood décor all year round.
Looking to add warmth to your living room or a unique centerpiece to your dining table? Rustic seasonal wood décor is perfect for bringing timeless charm to your home. So, why not start your next DIY project and enjoy the satisfaction of creating something beautiful yourself?
With diy wood crafts, you can add a personal touch to your home décor, making it truly special. Explore the world of rustic seasonal wood décor and find the perfect home décor ideas that match your style.