Welcome to our guide on making beautiful wooden decorations for your home this festive season. We’ll show you how to make ornaments, decorative signs, and centerpieces.
Our guide is friendly and will help you through various DIY holiday projects. You’ll have fun crafting with wood. With our easy woodworking crafts and beginner ideas, you can make stunning pieces for your holiday decor.
Check out our beginner-friendly projects and start your woodworking journey today!
The Joy of Holiday Woodcrafting for Beginners
Starting with holiday woodcrafting can be very rewarding. It lets you make unique decorations for your home. These decorations show off your personal style.
This activity is also calming. It helps you relax during the busy holiday season. You’ll find joy in creating something special.

Woodcraft tutorials and simple projects can help you learn. Begin with easy decorations and then try harder tasks. This way, you’ll grow your skills and confidence.
Woodcrafting brings people together. It’s fun to do with family or friends. So, grab your tools, pick your projects, and enjoy the fun of woodcrafting.
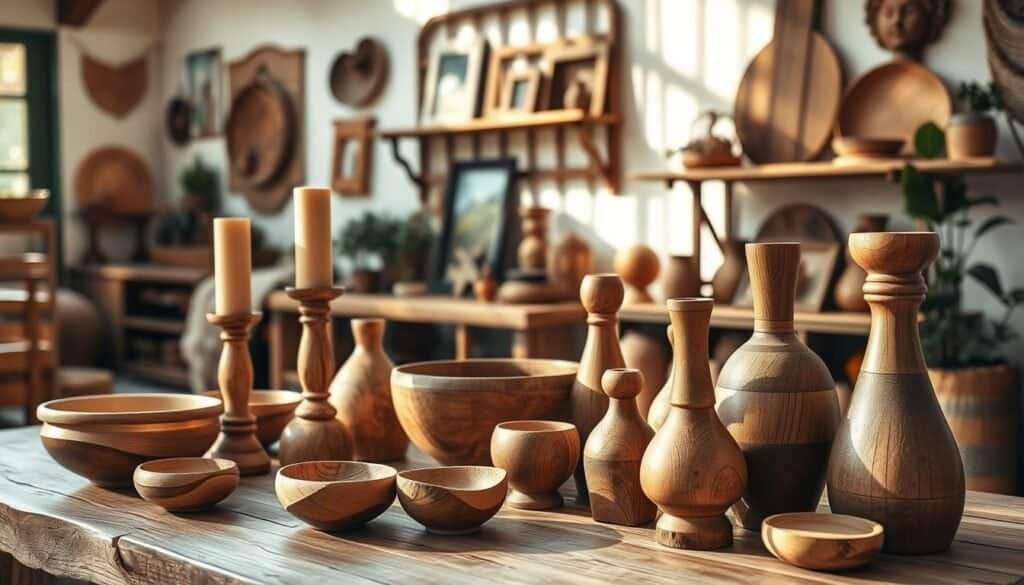
Getting Started: Basic Materials and Safety Tips
Before starting DIY woodworking projects, it’s key to know the basic materials and safety tips. These basics will make your woodworking journey safe and fun.
You’ll need basic materials like different types of wood, sandpaper, wood glue, and finishing nails for most projects. The exact materials needed might change with each project. But having these basics will help you get started.

Safety is very important in woodworking. Always wear safety glasses and a dust mask to protect yourself from sawdust and debris. Make sure your workspace is well-ventilated and clear of clutter to prevent accidents.
When using power tools, always follow the manufacturer’s instructions and work slowly to avoid mistakes. Keeping your tools in good condition and using the right techniques will also help keep your workspace safe.
By knowing the basic materials and following safety tips, you’re ready to start making beautiful DIY woodworking projects. Even if you’re new to woodworking, you can create amazing things.
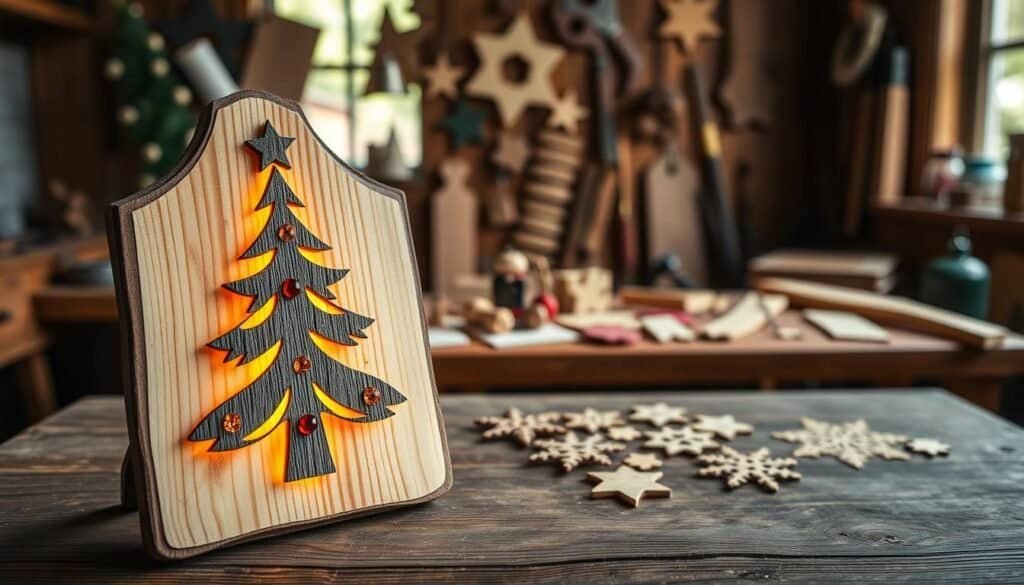
Simple Wooden Ornaments for Your Christmas Tree
Start your holiday season by making your own wooden ornaments. These ornaments are a fun project that add a personal touch to your tree.
Materials Needed
You’ll need a few basic things to begin. You’ll need wood (like pine or cedar), a saw, sandpaper, a drill, and a string or ribbon. You’ll also need paint or varnish to finish them. Feel free to add glitter, beads, or metallic paint for extra flair.

First, cut your wood into the shape you want for your ornaments. You can pick simple shapes like circles or stars, or try something more complex. After cutting, sand the shapes to make them smooth.
Then, drill a hole at the top of each ornament for hanging. Paint or varnish them to protect the wood and add color. You can choose natural finishes or bright holiday colors.
Once they’re dry, thread a string or ribbon through the hole. Hang them on your tree. You can also add glitter or beads for extra festivity. With these steps, you’ll have beautiful DIY ornaments to enjoy for years.
DIY Wooden Christmas Trees: Tabletop Decorations
Make this holiday season special by crafting your own DIY wooden Christmas tree. A wooden Christmas tree is a lovely tabletop decoration. It adds warmth and coziness to your home.

To start your project, you’ll need a few basic materials. These include:
Wooden dowels or a wooden plank (depending on the design you choose)
Sandpaper
Wood glue
Decorative items (optional) such as paint, varnish, or Christmas ornaments
Assembly Instructions
Once you have your materials, follow these steps to assemble your wooden Christmas tree:
Cut your wooden dowels or plank into the required lengths for your tree design.
Sand the cut edges to smooth them out.
Assemble the tree structure using wood glue, ensuring it’s sturdy and even.
Allow the glue to dry completely before decorating your tree.
You can get creative with your decorations. Use paint, varnish, or Christmas ornaments to give your tree a personalized look.
With these simple steps, you can create a beautiful DIY wooden Christmas tree. It’s a fun and rewarding project. It adds a personal touch to your holiday decor.
Festive Wooden Signs and Wall Decorations
Creating festive wooden signs and wall decorations is a great way to get into the holiday spirit. These charming decor pieces can add a warm, cozy touch to your home. They make it feel more inviting during the holiday season.
To get started, you’ll need a few basic materials. You’ll need wooden boards, paint, stencils, and a saw. You can choose from various woods, like pine or cedar, for the look you want. Consider using reclaimed or distressed wood for a rustic appearance.

When designing your festive wooden signs, think about the overall aesthetic you want to create. You can choose a classic, traditional look with red and green colors. Or, you can go for a more modern, minimalist design. Adding seasonal messages or phrases, like “Merry Christmas” or “Joy to the World,” can make your sign more meaningful.
To make your wall decorations more interesting, add texture and depth. You can use different materials, such as glitter, ribbons, or even LED lights. This will make your decor more visually appealing and dynamic.
By creating your own DIY wooden signs and wall decorations, you can add a personal touch to your holiday decor. With a little creativity and some basic crafting skills, you can create beautiful pieces. These will become a part of your holiday tradition for years to come.
Step-by-Step Holiday Crafts with Wood for Confident Beginners: Centerpieces
With just a few simple materials and basic woodworking skills, you can make a stunning wooden centerpiece. It’s not only a beautiful addition to your dining table. It also shows off your holiday spirit.
Materials and Tools
To begin, you’ll need some basic materials and tools. For a simple centerpiece, use wooden dowels, a wooden base, candles, evergreen branches, and decorative twine. You’ll also need a saw, a drill, sandpaper, and a hot glue gun. You can add your own twist with pinecones, holly, or ornaments.

First, cut the wooden dowels to the height you want for your centerpiece. Use the wooden pieces to make the base sturdy for candles or decorations. Sand the wood to make it smooth. Then, place evergreen branches around the base with twine or wire.
Put candles or your chosen decorations in the center. Now, your wooden centerpiece is ready to be the star of your holiday table.
Making a wooden centerpiece is a fun DIY project. It adds a warm, personal touch to your holiday decor. Follow these simple steps to create a beautiful centerpiece for your holiday gatherings.
Wooden Gift Ideas: Handcrafted Presents
Consider making handcrafted wooden gifts this holiday season for a unique touch. These gifts show the effort and care you put into creating something special.

Wooden gift ideas are endless. You can make wooden picture frames, cutting boards, and coasters. These DIY wooden gifts can be tailored to fit the recipient’s style.
Materials List
To start, you’ll need basic materials. For a wooden picture frame, you’ll need:
– Wood of your choice (e.g., oak, pine, or maple)
– Frame molding
– Wood glue
– Nails or a nail gun
– Sandpaper
– Wood finish (optional)
Assembly Instructions
First, cut the wood for your frame design. Use wood glue and nails to assemble it. Sand the edges to smooth them out. Apply a wood finish if desired to protect the wood and enhance its look.
Other handcrafted wooden gifts like cutting boards and coasters can be made the same way. Use hardwood for cutting boards and apply a food-safe finish. Coasters can be made from small wood pieces, sanded, and finished with a protective coat.
These Christmas gifts for family will be cherished for their thoughtfulness and craftsmanship. Making something with your own hands adds a personal touch, making the gift even more special.
Outdoor Wooden Holiday Decorations
Outdoor wooden holiday decorations can make your home’s exterior feel warm and inviting during the holidays. They’re perfect for creating a festive vibe or just to make your home look better. Wooden decorations are a fantastic choice.
Starting is easy with a wooden Christmas sign or a festive wreath for your door. These projects need just a few materials and can be done in a few hours.
For bigger projects, think about making a wooden Nativity scene or a Christmas tree for your lawn. You can use reclaimed wood or new lumber, based on what you like and can afford.
Materials List
To start, you’ll need some basics. These include:
– Reclaimed or new lumber (depending on your project)
– Wood screws and nails
– Waterproof glue
– Waterproof sealant or stain
– Outdoor paint or varnish (optional)
Construction and Finishing
Construction methods vary by project. But most outdoor wooden decorations need basic carpentry skills like measuring, cutting, and assembling.
To keep your decorations weatherproof, apply waterproof sealant or stain. You can also paint or varnish them to protect the wood and make it look better.

By following these steps and using the right materials, you can make beautiful outdoor wooden holiday decorations. They’ll add to your home’s festive look for many years.
Upcycled Wood Pallet Holiday Projects
Make your holiday season special with upcycled wood pallet projects. They bring a rustic charm to your home. Plus, they’re eco-friendly and let you create unique decorations.
Try making a pallet Christmas tree. Break down the pallet into planks and shape them into a triangle. Decorate it with lights, ornaments, or garlands for a festive vibe.

DIY pallet Christmas decorations, like signs or wall hangings, are also great. Paint or stain the wood to fit your decor. Add holiday themes or messages for a personal touch.
For something bigger, try a pallet wall hanging or a mantel decoration. Old pallets can become stunning, functional pieces for your holiday decor.
Upcycled wood pallet projects are a fun, creative way to celebrate the holidays. They’re good for the environment too. So, grab some old pallets and start your next DIY project!
Wooden Advent Calendars and Countdown Crafts
Wooden advent calendars are a delightful way to wait for Christmas. They turn each day into a special moment. Plus, they add a beautiful touch to your home.

To make a wooden advent calendar, you’ll need some basic stuff. Start with a wooden base or connected boxes. You can pick a ready-made one or design your own.
You’ll also need small doors or drawers, hinges, and a way to count down, like numbers or chalkboards.
Don’t forget to add some decorations. Paint, varnish, or festive decorations can make it look great.
Assembly Steps
First, put together the wooden structure as you designed it or as the instructions say. Attach the doors or drawers, making sure they’re secure and easy to open. Install the hinges and any other hardware needed.
Then, add the countdown part. Number the doors or drawers from 1 to 24 for the 24 days before Christmas. Or, use chalkboards or labels for daily messages or activities.
Last, decorate your advent calendar to match your holiday theme. Paint or stain the wood, add decorations, or use garlands or lights. This makes it a unique and special part of your holiday tradition.
Kid-Friendly Wooden Holiday Crafts
Wooden holiday crafts are a great way to boost kids’ creativity. They’re a fun way to spend time together and help kids improve their fine motor skills. This is because they need to use their hands and eyes to work on the crafts.
Younger kids can enjoy decorating wooden ornaments or putting together wooden shapes. You can use wood that’s already finished or let them paint and decorate the ornaments. This is a great way to introduce them to woodworking.

Older kids can try more challenging projects like making a simple birdhouse or a wooden picture frame. These projects help them learn about measurements and following instructions. They also improve their woodworking skills.
It’s very important to keep kids safe when they’re doing woodworking. Make sure they wear safety glasses and gloves. Always watch them when they’re using tools or working with wood.
Other fun wooden holiday crafts for kids include making advent calendars, creating snowflakes, or building a nativity scene. These activities are not only fun but also teach kids about the holiday season. They learn about its importance and traditions.
Wooden Holiday Village: Build Your Own Scene
Get into the holiday spirit by crafting your own wooden holiday village. It’s a great project for crafty beginners. A wooden holiday village adds charm to any home during the holidays.

To start your DIY holiday village, gather basic materials. You’ll need different types of wood, a hot glue gun, sandpaper, and festive decorations. Choose woods with different textures to add depth.
Construction Steps
Begin by preparing the base. Cut a piece of plywood or MDF to the desired size. Then, start building your village structures, starting with the simplest designs first.
Use a hot glue gun to assemble the pieces, and sand any rough edges. Once your structures are built, decorate them with paint, glitter, or other embellishments.
Arrange your buildings on the base to create a visually appealing scene. Add final touches with small decorations and lighting. This will bring your wooden Christmas scene to life.
Building a wooden holiday village is a fun and rewarding project. It can become a cherished holiday tradition. With these steps, you can create a beautiful Christmas village display that will be a joy to behold each year.
Wooden Mantel Decorations for the Holidays
The mantel is a key spot in many homes during the holidays. Wooden decorations can make it truly special. With a few simple DIY projects, you can create a warm and inviting atmosphere that shows off your personal style.
One easy way to decorate your mantel is with a wooden garland. You can use pre-made garlands or make your own with wooden elements like pinecones, branches, and ornaments. Just arrange your chosen elements along a length of twine or ribbon, and hang it across your mantel for a rustic, charming look.

Wooden stockings and signs can also add a personal touch to your mantel. Think about making custom wooden stockings with names or festive designs. Hang them from the mantel along with your garland. A wooden sign with a holiday message or a festive quote can also be a beautiful addition.
When designing your wooden mantel decorations, think about the look you want to achieve. Choose materials and techniques that match your style, whether it’s rustic and distressed or polished and modern. With a little creativity, you can create a stunning holiday display that becomes the centerpiece of your home.
Quick Weekend Wood Projects for Last-Minute Decorating
Don’t let time stop you from making beautiful holiday decorations. Try these simple weekend wood projects. With basic materials and easy crafts, you can make your home special.
Creating wooden ornaments is a simple DIY project. You can use pre-cut shapes or cut your own. Add paint, a string, and decorations for a beautiful ornament.

Building a small wooden Christmas tree is another quick project. Use a template or design your own. Assemble it, add decorations, and you have a lovely decoration.
Making a wooden sign is great for last-minute decorations. Use wood, paint, and stencils for a festive message. It’s a personal touch for your holiday decor.
These woodworking crafts are perfect for a weekend. They need little material and can be done fast. So, get creative and make something special for the holidays.
Finishing Techniques for Holiday Wood Crafts
To make your holiday wood crafts look professional, you need to learn different finishing techniques. The right finish brings out the wood’s natural beauty and keeps it safe from damage.
Staining is a popular choice. It adds color and depth to your crafts. There are many stain colors to pick from. Always test the stain on a small area first, following the instructions.

Painting is another great option. You can use acrylic or latex paint to add color. Make sure to prime the wood first for a smooth finish.
Sealing your crafts is key to protect them from moisture and wear. Use a clear varnish or polyurethane. Apply thin coats, letting each dry before adding the next.
Learning these techniques will help you make your holiday wood crafts look amazing. You’ll create beautiful, professional decorations for your home.
Conclusion: Celebrating the Holidays with Handcrafted Wooden Treasures
Creating handcrafted wooden treasures is a great way to make your holiday celebrations special. The DIY wooden gifts and decorations you make are not just pretty. They also show the love and effort you put into them.
Making DIY wooden gifts for your loved ones adds a personal touch to your holiday traditions. These gifts show how much you care and pay attention to detail. They become truly special. As you keep exploring your creativity, these handcrafted items will become a cherished part of your Christmas traditions.
The joy of crafting during the holiday season is a gift itself. It lets you slow down, be present, and make lasting memories with family and friends. When you display your handcrafted wooden treasures, you’ll remember the love and effort you put into them. This makes your holiday celebrations even more special.