Finishing a woodworking project can make you feel proud. But, one mistake in the finishing process can ruin it all. Many woodworkers have felt frustrated when they found a flaw just before finishing.
Knowing the right wood finishing techniques is key to a professional look. By avoiding common mistakes and using effective diy wood finishing strategies, your projects will look great.
With the right tips, you can avoid a bad finish and feel proud of your work. In this article, we’ll look at common mistakes and how to avoid them.
The Critical Role of Finishing in Woodworking Projects
In woodworking, the finishing stage shows off the true craftsmanship. A well-finished project looks better and lasts longer. The right wood finishing techniques are key to a professional finish.
One big mistake in woodworking is ignoring the finishing stage. The best practices involve careful preparation and applying the finish right. Following these steps helps avoid common mistakes that can spoil a great project.

To avoid wood finishing errors, pay close attention to detail. Knowing the finishing process well is important. Using the right tools, homemade or store-bought, greatly improves the finish. Mastering wood finishing techniques helps woodworkers achieve top-notch results.
The finishing stage is vital for a project’s quality and lifespan. By following the best practices and avoiding common mistakes, craftsmen can make sure their projects stay beautiful and useful for years.
Rushing Through Surface Preparation
In woodworking, surface preparation is key. Skipping this step can ruin your finish. A good foundation is essential for a great finish.

Sanding is a big part of surface prep. The right sanding techniques are vital for a smooth finish. This is true for any woodworking project, big or small.
When to Change Sandpaper Grits
Changing sandpaper grits is important. Start with a coarse grit to remove flaws. Then, move to finer grits for a smoother look. This makes your project look professional.
Sanding with the Grain vs. Against It
Sanding with the grain is a must. Sanding against the grain can leave hard-to-remove scratches. Using the right tools can help, but always follow the grain for the best results.
By spending time on surface prep, you can avoid mistakes. This ensures your project looks its best. Whether using old or new methods, the details matter.
Skipping the Wood Conditioning Step
One big mistake in woodworking is not conditioning the wood before finishing. Conditioning prepares the wood to take the finish evenly. This step is key for a professional look. Without it, the wood might soak up the finish unevenly, causing blotches and color changes.

Whether you need to condition the wood depends on the type. Knowing the difference between softwoods and hardwoods is important. This helps figure out what your project needs.
Softwoods vs. Hardwoods
Softwoods come from coniferous trees and have a more even density. Hardwoods, from deciduous trees, have a different density. This affects how they take finishes. Softwoods usually need less conditioning, but hardwoods often do.
Even softwoods with knots or other flaws can benefit from conditioning. It helps them look better.
Blotch-Prone Species
Some woods, like pine and cherry, are prone to blotches. They soak up finishes unevenly, making blotches. Conditioning these woods before finishing can greatly reduce blotches. This ensures a smooth finish.
By knowing your wood’s needs and conditioning it right, you can get a professional finish. This improves the quality of your woodworking project.
Applying Finishes in Improper Environmental Conditions
To get a top-notch finish, you must think about the environment you’re working in. The conditions around you can really change how your diy wooden projects turn out. Things like temperature, humidity, and dust play big roles in how finishes dry and look.

Keeping your workshop just right is key. You can do this by making a few tweaks to control the temperature and humidity. For example, using a dehumidifier or humidifier can keep things stable, perfect for finishing.
Simple Workshop Modifications
Making a few changes to your workshop can really help. Make sure it’s well-ventilated, use diy woodworking jigs to cut down on dust, and keep it tidy.
Timing Your Finishing Schedule
When you apply finishes, timing is everything. Plan your schedule based on the weather and how long it takes for each coat to dry. Try to avoid finishing when it’s too hot or cold outside.
By focusing on the environment and making the right changes, you can get a finish that really shows off your woodworking skills. Whether you’re making things to sell or just for your home, the right finishing techniques are essential for a professional look.
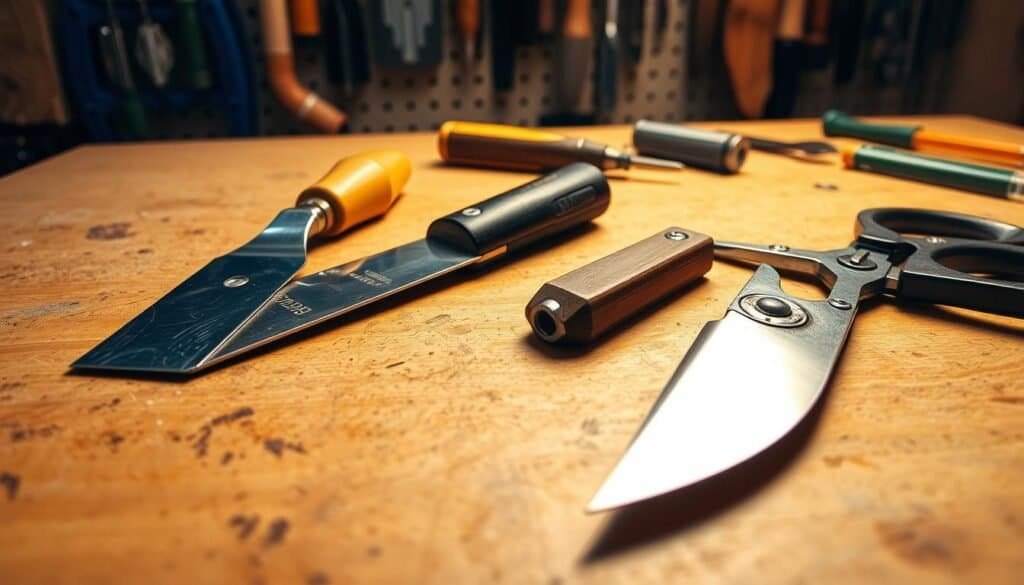
Using the Wrong Applicator for Your Finish
Woodworkers often overlook the importance of selecting the right applicator for their finish. The wrong choice can greatly affect the quality and look of the final product. Each finish needs a specific applicator, and using the wrong one can result in a poor finish.

Rags work well for oil-based finishes, helping to get a smooth coat.
Sprayers are best for big, flat surfaces, giving a uniform finish.
Natural vs. Synthetic Applicators
Natural brushes, like those made from animal hair, are good for oil-based finishes. They hold a lot of finish and apply it smoothly.
Synthetic brushes, made from nylon or polyester, are versatile. They can be used with many finishes, including water-based ones.
The right applicator choice depends on the project’s needs. This includes the finish type and desired outcome. By picking the right one, woodworkers can achieve a professional finish that highlights their work’s beauty.
Finishing Mistakes Woodworkers Regret, & How to Avoid It Before It’s Too Late
Mistakes in finishing can be a woodworker’s biggest regret. But, there are ways to steer clear of these errors. Finishing is key in woodworking, affecting your project’s quality.
One big finishing mistake to avoid is not prepping the surface right before applying a finish. This can cause a poor finish that doesn’t stick well to the wood. Always sand your project well and fill any gaps or holes.

Choosing the wrong finish is another mistake. Different projects need different finishes. For example, outdoor furniture needs a finish that resists UV light and moisture. Think about your project’s purpose when picking a finish.
For easy diy builds, always follow the finish’s manufacturer instructions. This means applying the right number of coats and waiting the correct drying time between coats. Doing this right gives your project a professional finish.
When making furniture, the finish not only makes it look better but also protects the wood. By avoiding common mistakes and following wood finishing tips, your projects will look great and last longer.
Neglecting to Test Finishes on Scrap Wood
Woodworkers often forget the importance of testing finishes on scrap wood. This step is key to the quality of your final product. Testing finishes on scrap wood lets you see how they will look and work on your project.

Applying the finish to a scrap piece helps you check its color, texture, and sheen. This simple step can save time and resources by spotting issues early.
Color Accuracy Assessment
Testing finishes on scrap wood is mainly for color accuracy. Different woods absorb finishes differently, changing the color. Testing helps you adjust the finish to get the right color.
Texture and Sheen Evaluation
Testing also lets you check the texture and sheen of the finish. Some finishes might not be right for your project. Testing ensures the finish looks and feels as you want.
Adding this step to your finishing process greatly improves your carpentry projects. It’s a simple yet effective way to make sure your work looks professional and meets your standards.
Applying Too Much Finish in a Single Coat
Finishing woodworking projects can be tricky. One big mistake is using too much finish at once. This can cause uneven finishes and slow down drying times.

Too much finish leads to drips, runs, and sags. These flaws can mess up a piece’s look. You might need to do extra work to fix them.
Drips, Runs, and Sags
Drips, runs, and sags happen when finish doesn’t spread evenly. This makes the surface look bad and hard to sand.
Extended Drying Times
Using too much finish also makes drying take longer. Finish makers give drying times for the right amount. Too much can make drying times double or triple, slowing down your project.
To fix these issues, apply finish in thin, even layers. Let each layer dry as the maker says before adding more. This way, you get a smooth finish that makes your wood projects look great and last long.
Being careful with how much finish you use and following the right application steps is key. This way, woodworkers can make projects that are both beautiful and durable.
Inadequate Drying Time Between Coats
Getting the drying time right between coats is key for a top-notch finish in woodworking. If you rush it, you might end up with uneven finishes, drips, and a weak bond between the wood and finish.
When you’re applying multiple coats, patience is a must. Each coat needs enough time to dry fully. This lets the solvents evaporate and the finish cure right. It makes the finish smooth and even, and also makes the project last longer.

To manage drying times well, think about the environment. Temperature, humidity, and air flow all affect drying speed. For example, a well-ventilated area can cut drying times down. Always follow the product’s instructions for drying time, as it varies.
For woodworkers making crafts to sell, knowing about drying time is critical. It can make the difference between a saleable item and a flawed one. Also, when trying out different wood crafting ideas, a good finish can really boost the piece’s look and value.
Whether you’re experienced or new to woodworking, getting the drying time right is vital. It improves your projects’ look and makes them last longer.
Improper Sanding Between Finish Coats
To get a top-notch finish, it’s key to sand right between coats. Sanding removes small flaws, dust, and raised grain from the finish. This step is vital for a smooth, even look that makes your project stand out.

Choosing between sandpaper and steel wool depends on your project’s needs. Sandpaper is more aggressive for removing more material. Steel wool is finer for a smoother finish.
When to Use Sandpaper vs. Steel Wool
Sandpaper is best for tackling big imperfections or when you need a more aggressive sand. Steel wool is better for fine-tuning, perfect for delicate finishes or detailed work.
Grit Selection Guide
Choosing the right grit for sanding is important. Start with a fine grit like 220 or 320 for most projects. For an even smoother finish, go to 400 or 600 grit.
Knowing when to pick sandpaper or steel wool and the right grit makes a big difference. Proper sanding between coats can take your woodworking to the next level, giving you professional-grade results.
Mixing Incompatible Finishing Products
Using the wrong finishing products can ruin your woodworking project. Mixing products that don’t go together can lead to uneven finishes and failure. This can really hurt the quality of your work.

Oil-based and water-based products are two main types. Oil-based finishes dry slowly but last longer. They’re harder to clean up. Water-based finishes dry fast and are easy to clean, but they might not last as long.
Oil-Based vs. Water-Based Products
Switching between oil-based and water-based products needs careful thought. Applying a water-based product over oil-based can cause problems. But, you can apply oil-based over water-based if you prepare the surface right.
Shellac Compatibility Issues
Shellac is a special product that needs careful use. It can be a primer or a topcoat. But, it only works well with certain products. For example, it can go under oil-based or water-based finishes if the surface is ready.
To avoid problems, test products on a small area first. Always follow the manufacturer’s instructions. And, work in a well-ventilated area. Using diy woodworking jigs can help you apply products accurately for a great finish.
Neglecting Proper Ventilation and Safety Measures
When working with wood finishes, it’s key to have good ventilation and safety. Finishes contain chemicals that can harm you if you breathe them in or touch them. This is why safety is so important.

To stay safe, work in a place with lots of air. Open windows or use a fan to clear out fumes. Also, wearing protective gear is a must.
Respiratory Protection Options
For your lungs, use dust masks or respirators. Dust masks help against dust, while respirators protect against dust and chemicals. Pick the right one based on the finish you’re using.
Eye and Skin Protection
Protect your eyes with safety glasses or goggles. This stops irritation or injury. Wear gloves to avoid skin contact with finishes. Some also wear full-body coverings for extra protection.
Putting ventilation and safety first keeps you healthy and safe at work. Whether you’re experienced or new to woodworking, a safe workspace is essential.
Poor Grain Filling Techniques for Open-Grained Woods
To get a silky smooth finish on open-grained woods, mastering grain filling techniques is key. Open-grained woods, like oak and ash, have a porous texture. This makes it hard to achieve a flawless finish.
Grain filling is a vital step in woodworking. It involves filling the wood’s pores to create a smooth surface. For open-grained woods, this step is essential for a professional finish. By using a grain filler, you can greatly improve your handmade wooden tools and DIY wood projects.

When working on grain filling, remember a few important tips. First, pick the right grain filler for your project. Some fillers are made for specific woods, so always check the instructions. Also, apply the filler in thin coats and let it dry fully between coats for a smooth finish.
By mastering grain filling techniques and applying them to your open-grained wood projects, you can get a professional-looking finish. This enhances the beauty of the wood. Whether it’s a handmade wooden tool or a DIY wood project, a well-filled grain makes a big difference in the final look.
Improper Finish Selection for the Project’s Purpose
The success of a woodworking project depends on the right finish. Different projects need different finishes for both looks and durability.
Kitchen and Bathroom Applications
Kitchens and bathrooms need finishes that fight moisture and humidity. Water-based finishes or those with water-resistance are best. For example, a water-based polyurethane finish protects against moisture while keeping the wood’s natural look.
Outdoor vs. Indoor Considerations
Outdoor projects face UV rays, rain, and extreme temperatures. Finishes that resist UV rays or are exterior-grade are good choices. Indoor projects have more finish options, based on sheen and durability.
Choosing the right finish means thinking about the project’s use and look. This ensures your work stays beautiful and strong over time.

Learning woodworking means knowing about finish selection. It’s not just applying a coat; it’s about making the wood look great and protecting it. Whether it’s a kitchen table or an outdoor bench, the finish is key to success.
Inadequate Edge Treatment Before Finishing
Before you finish your woodworking project, treating the edges is key. Poor edge treatment can ruin the look and durability of your work. Edges are more prone to damage, so they need special care.

Edge treatment is more than just sanding. It’s about choosing the right techniques and materials. For example, when making a woodworking bench, aligning and sanding the edges is vital. This prevents the finish from looking uneven.
For projects that sell, like custom furniture, the edge finish matters a lot. It shows the quality of the piece. Following wood plans well means paying attention to edge treatment. This makes your project stand out.
By focusing on edge treatment, woodworkers can improve their projects’ quality and durability. Whether it’s a simple item or a complex piece, proper edge treatment makes a big difference. It ensures your work looks professional.
Conclusion: Elevating Your Woodworking Through Better Finishing Practices
Improving your finishing skills is key to better woodworking. By avoiding common mistakes, you can make your projects much better. This article has given you the basics to enhance your finishing skills.
Learning different finishing techniques is vital for making beautiful and lasting projects. By following the tips in this article, you can elevate your DIY woodworking. Whether you’re new or experienced, focusing on better finishing will lead to amazing results.
To keep getting better, always use the right techniques and materials. This will not only make your projects look great but also last longer. With time and effort, you’ll create stunning pieces that show off your skills.